I finally got my inspiration back. Moving from our first apartment together to our new home was a bit of a struggle. For starters, moving. It was a long and exhausting 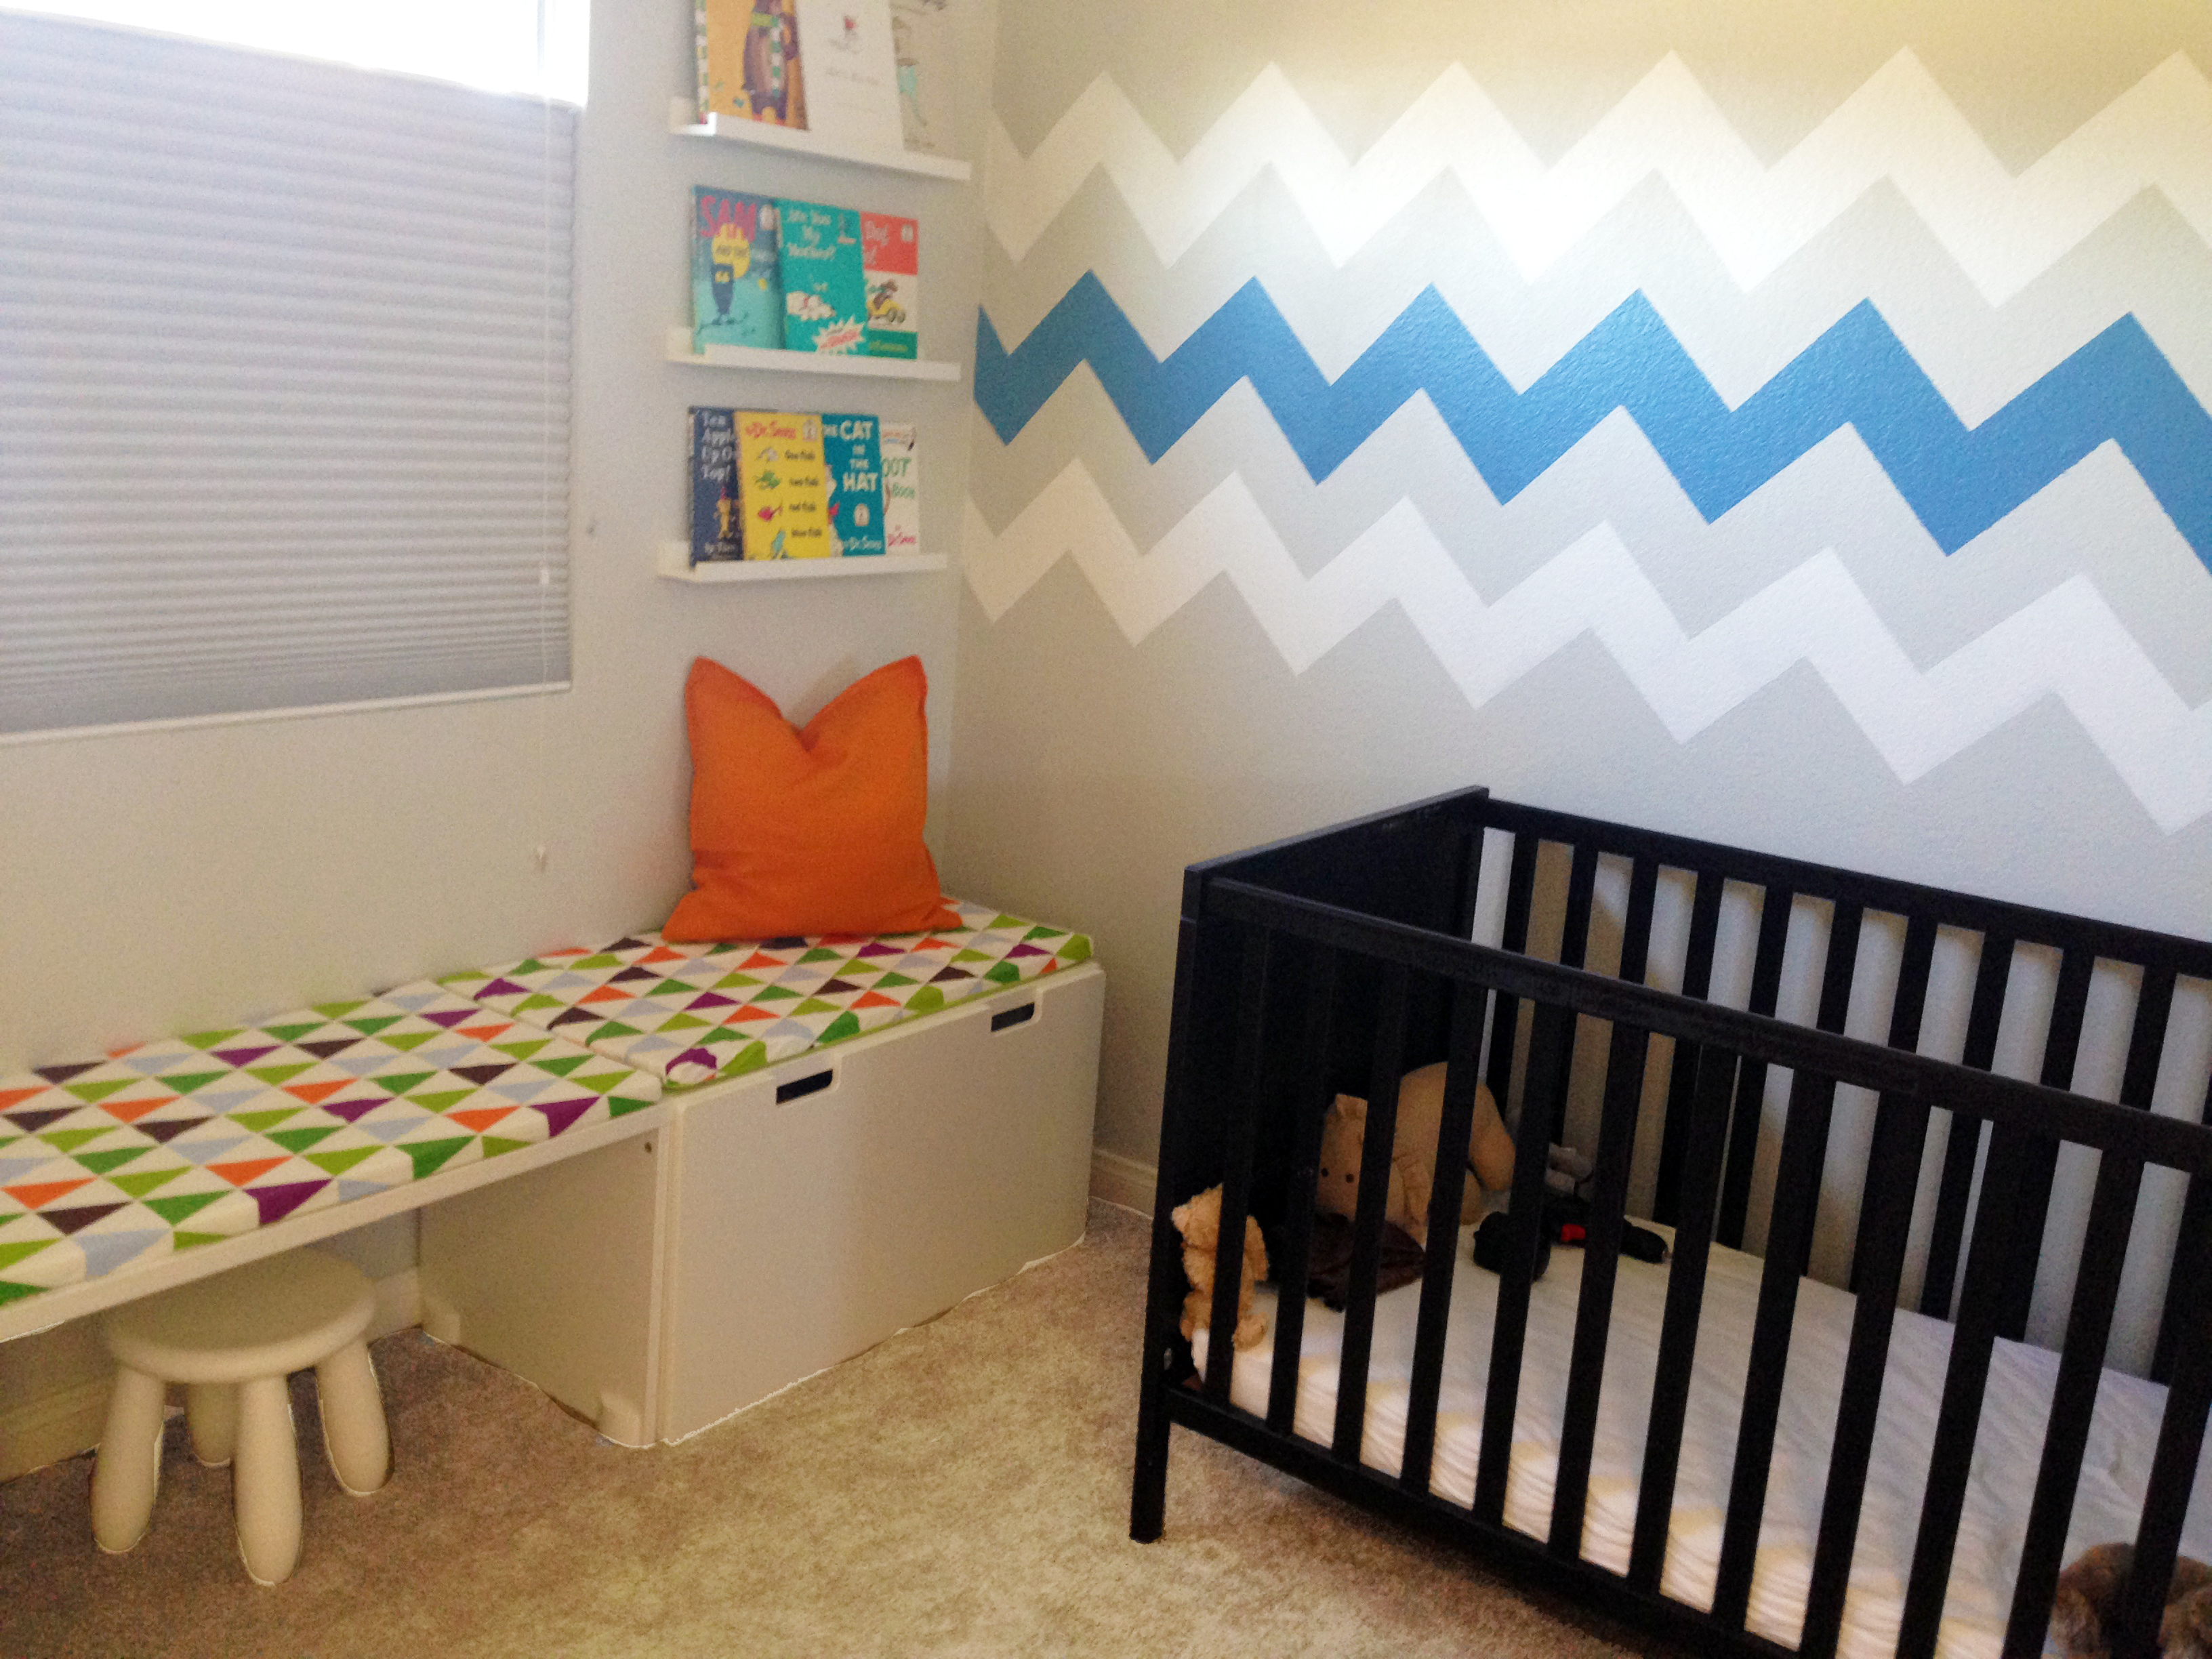 process. Finding the perfect place for everything, creating a clean and functional home. Realizing that our furniture was not working for our new place was the second hurdle. Getting rid of all these pieces that I love has been a frustrating process. I still have a large bookcase in my living room that Adam and I refuse to give away for pennies on Craigslist.
Last weekend we finally sold a queen bed that was in Alexander’s room. I now was able to give my son a proper room where he can grow, learn and play. It is a work in progress (like everything is), but I am proud of what I have accomplished so far.
I got my inspiration reading magazines, browsing other fellow bloggers websites as well as Pinterest. You see so many beautiful nurseries or transitional bedrooms on Pinterest that you want to magically appear at your home. But it is not as easy as it looks.
My main struggle was creating a beautiful but functional bedroom. Some bedrooms are just not realistic or they require constant cleaning. An example would be having colorful baskets with blankets or toys. The first thing Alexander would do is turn the basket upside down and then stand on top of the basket and break it. Or having the classic Ikea bookcases that people use as benches; Alexander would pull everything out and eventually he would rip his books apart. It just wasn’t going to work for us.
I had to start somewhere, so I decided my first move was to have a design element on the wall above his crib. Chevron is in style this year so I ambitiously decided I wanted a touch of it on that wall. It was such a frustrating and long project, but it paid off. I love it!
Here is how I did it:
You will need:
1. Thin blue tape.
2. A level.
3. Chalk.
4. Exacto knife.
5. Your paining supplies.
1. Measure your wall widthwise and divide by two to find the center of your wall. With the help of your level for precision draw a vertical line with chalk to divide your wall . Draw the line as long as you want your chevron pattern to go. You can do a banner like I did or do the whole wall. F.Y.I.: The whole wall will take you a couple of days.

2. With some chalk and a your level create a 6 inch by 6 inch grid on the rest of the wall or area you will work with (If you want larger or smaller chevrons divide by that number). I decided I wanted them to be 6 inches long by 6 inches in between each chevron to make a clean pattern.
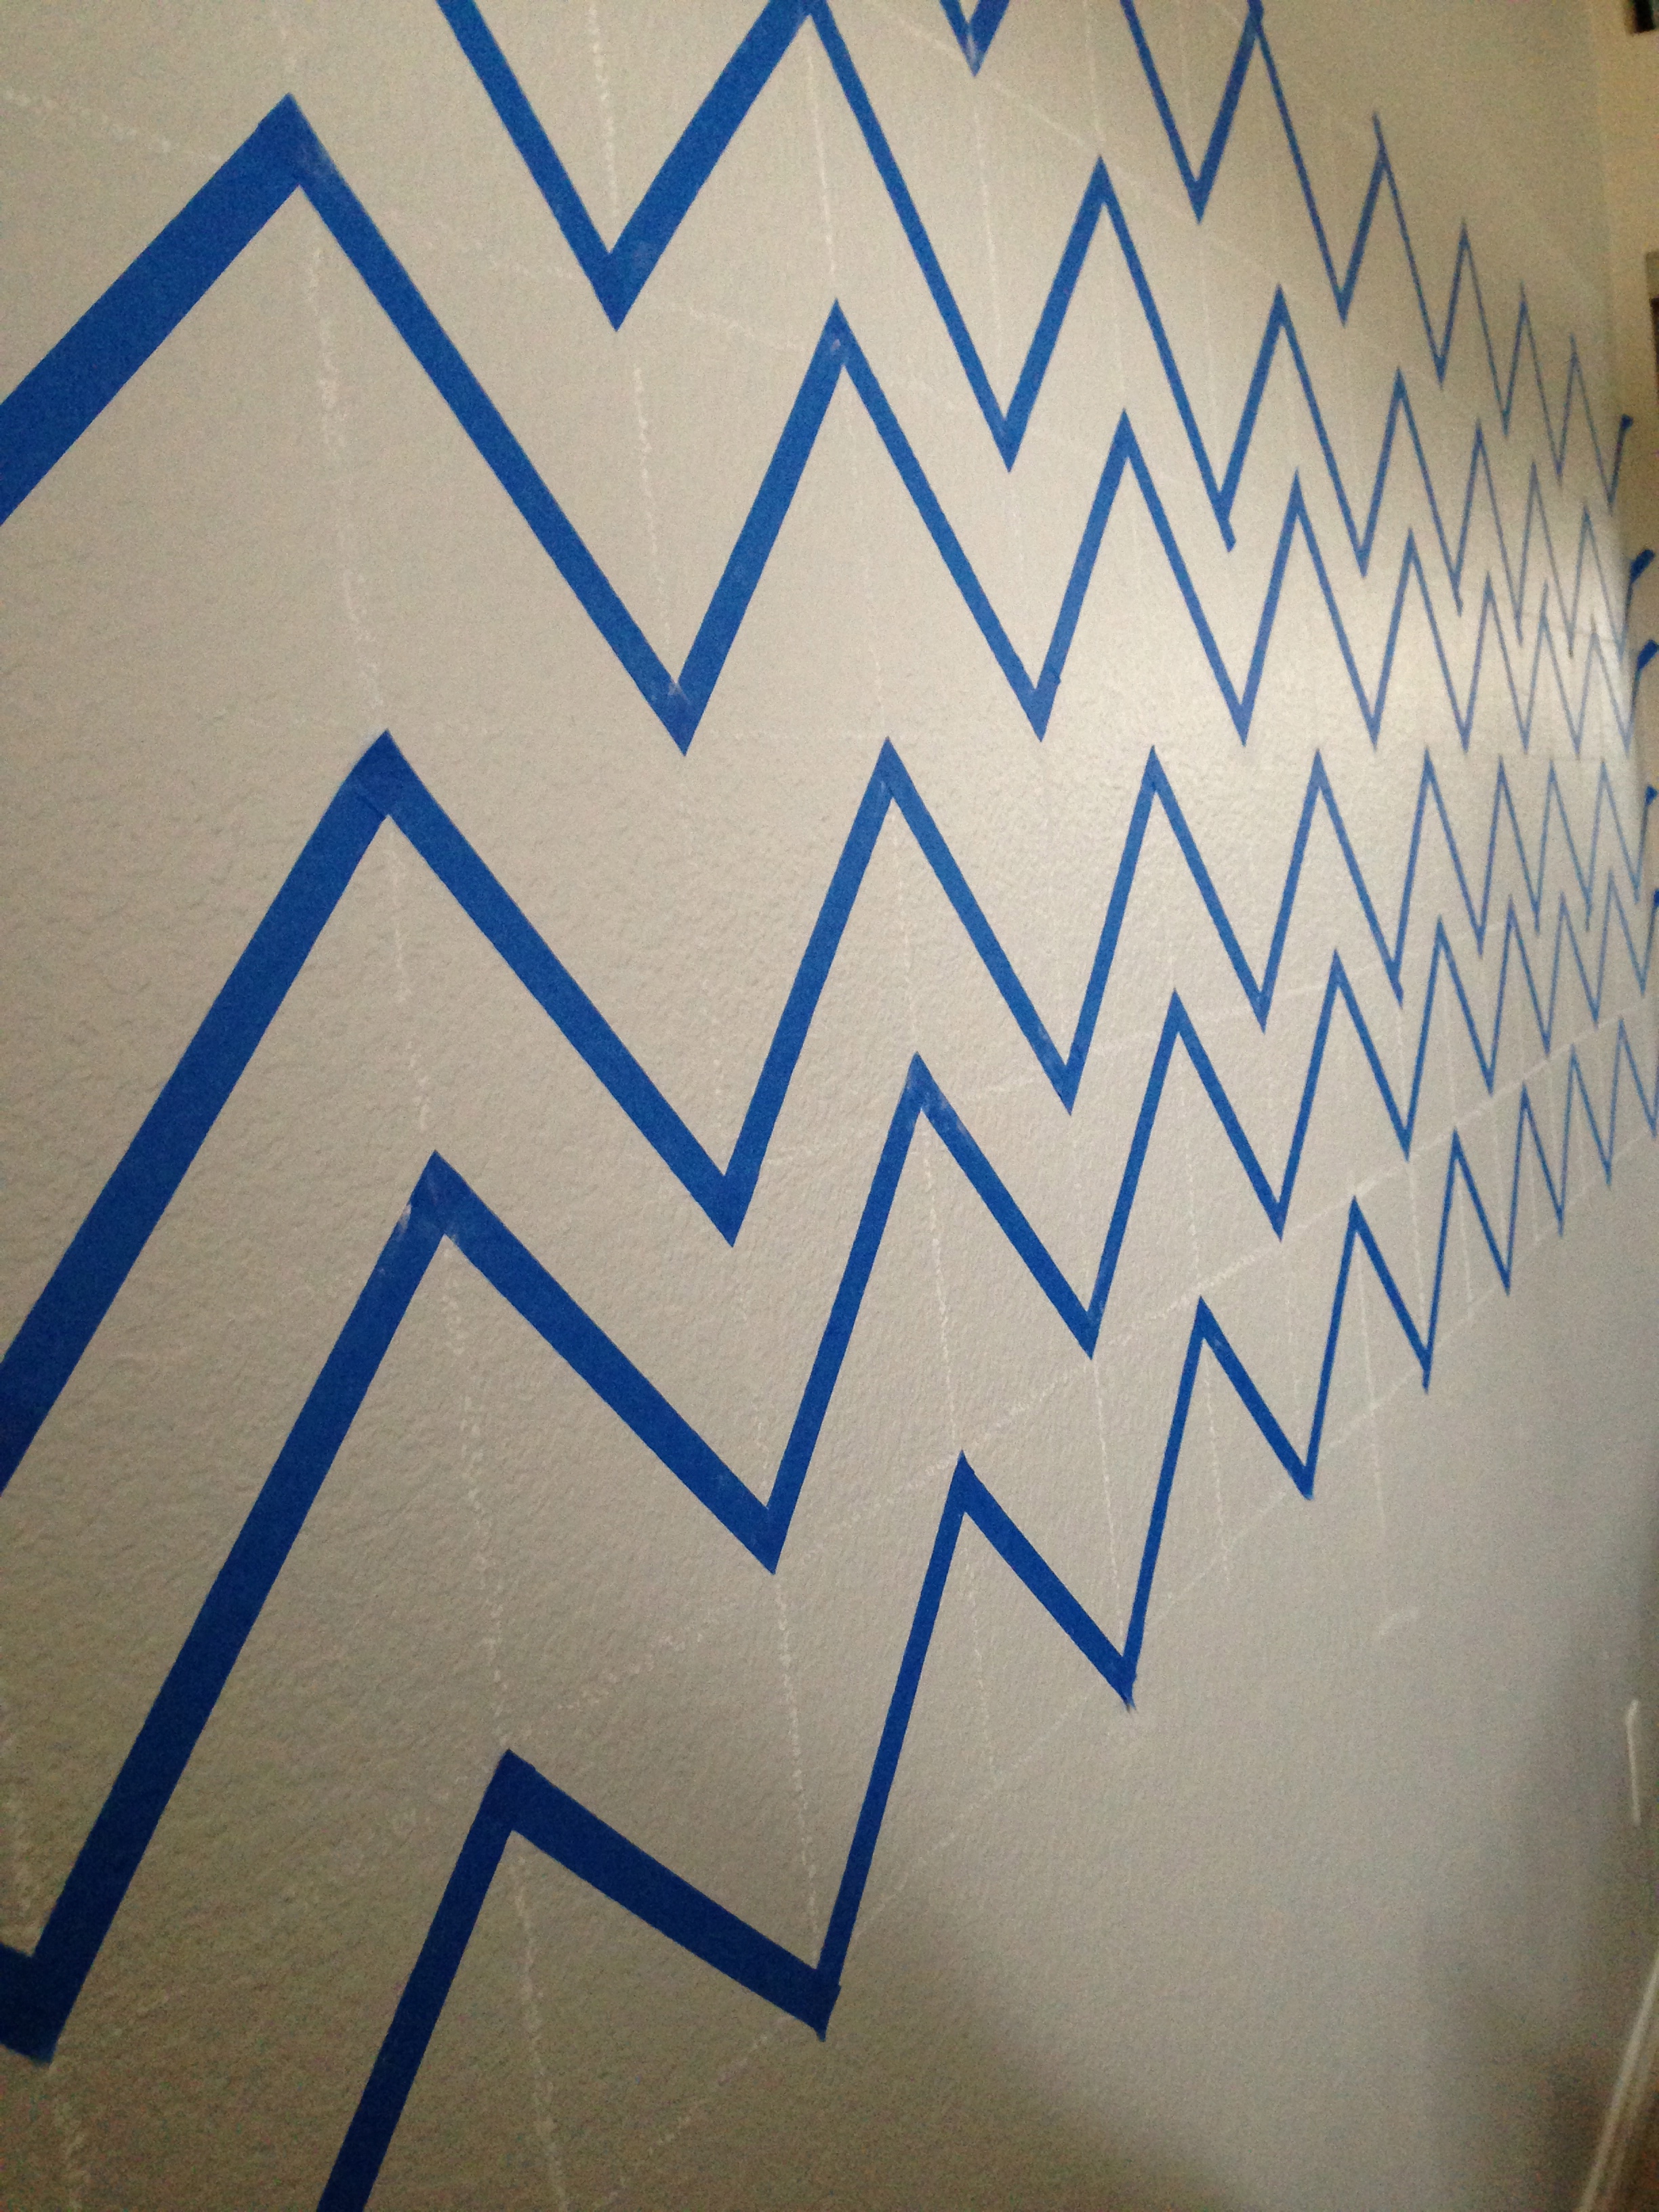
3. Taping. This is by far the hardest part. Be patient. It is very important that you purchase a thin tape. I had a wide one and it made very difficult to make clean points on each chevron. I gave up and went and purchased a thiner tape.
4. Start by the top row. Start taping the furthest top left point. Put the tape right above the chalk grid diagonally down to the next row finishing right above the grid, then diagonally back up to the next grid finishing right above the grid. Continue taping until you finish that whole horizontal row. Since you wont paint above the tape you can slack a bit on the preciseness of the tape finish on each point. The bottom points have to be perfect. You can use and exacto knife to clean the extra tape.
5. Go to the next row, starting again on the left side under the last row. This time the tape has to start right under the grid. Why? Because you have to account for the width of the tape. You will alternate each row. This will leave one row wider than the next. You will eventually paint on the wider blank space. The thiner rows don’t have to have the tape points made with the precision the wider rows do. See image below. Continue until you finish taping the area you are working with.

6. After you finish taping make sure the tape is well stuck to the wall. Use your thumb and go over each row of tape.
7. Erase the chalk grid with a dry towel, try to avoid the tape.
8. Paint the wider rows with the color of your choice. I used both a small roller and a brush. The brush I used to “cut” the paint along the tape, making sure the points were completely painted. The small roller to hide the brush strokes making my work as clean as possible.

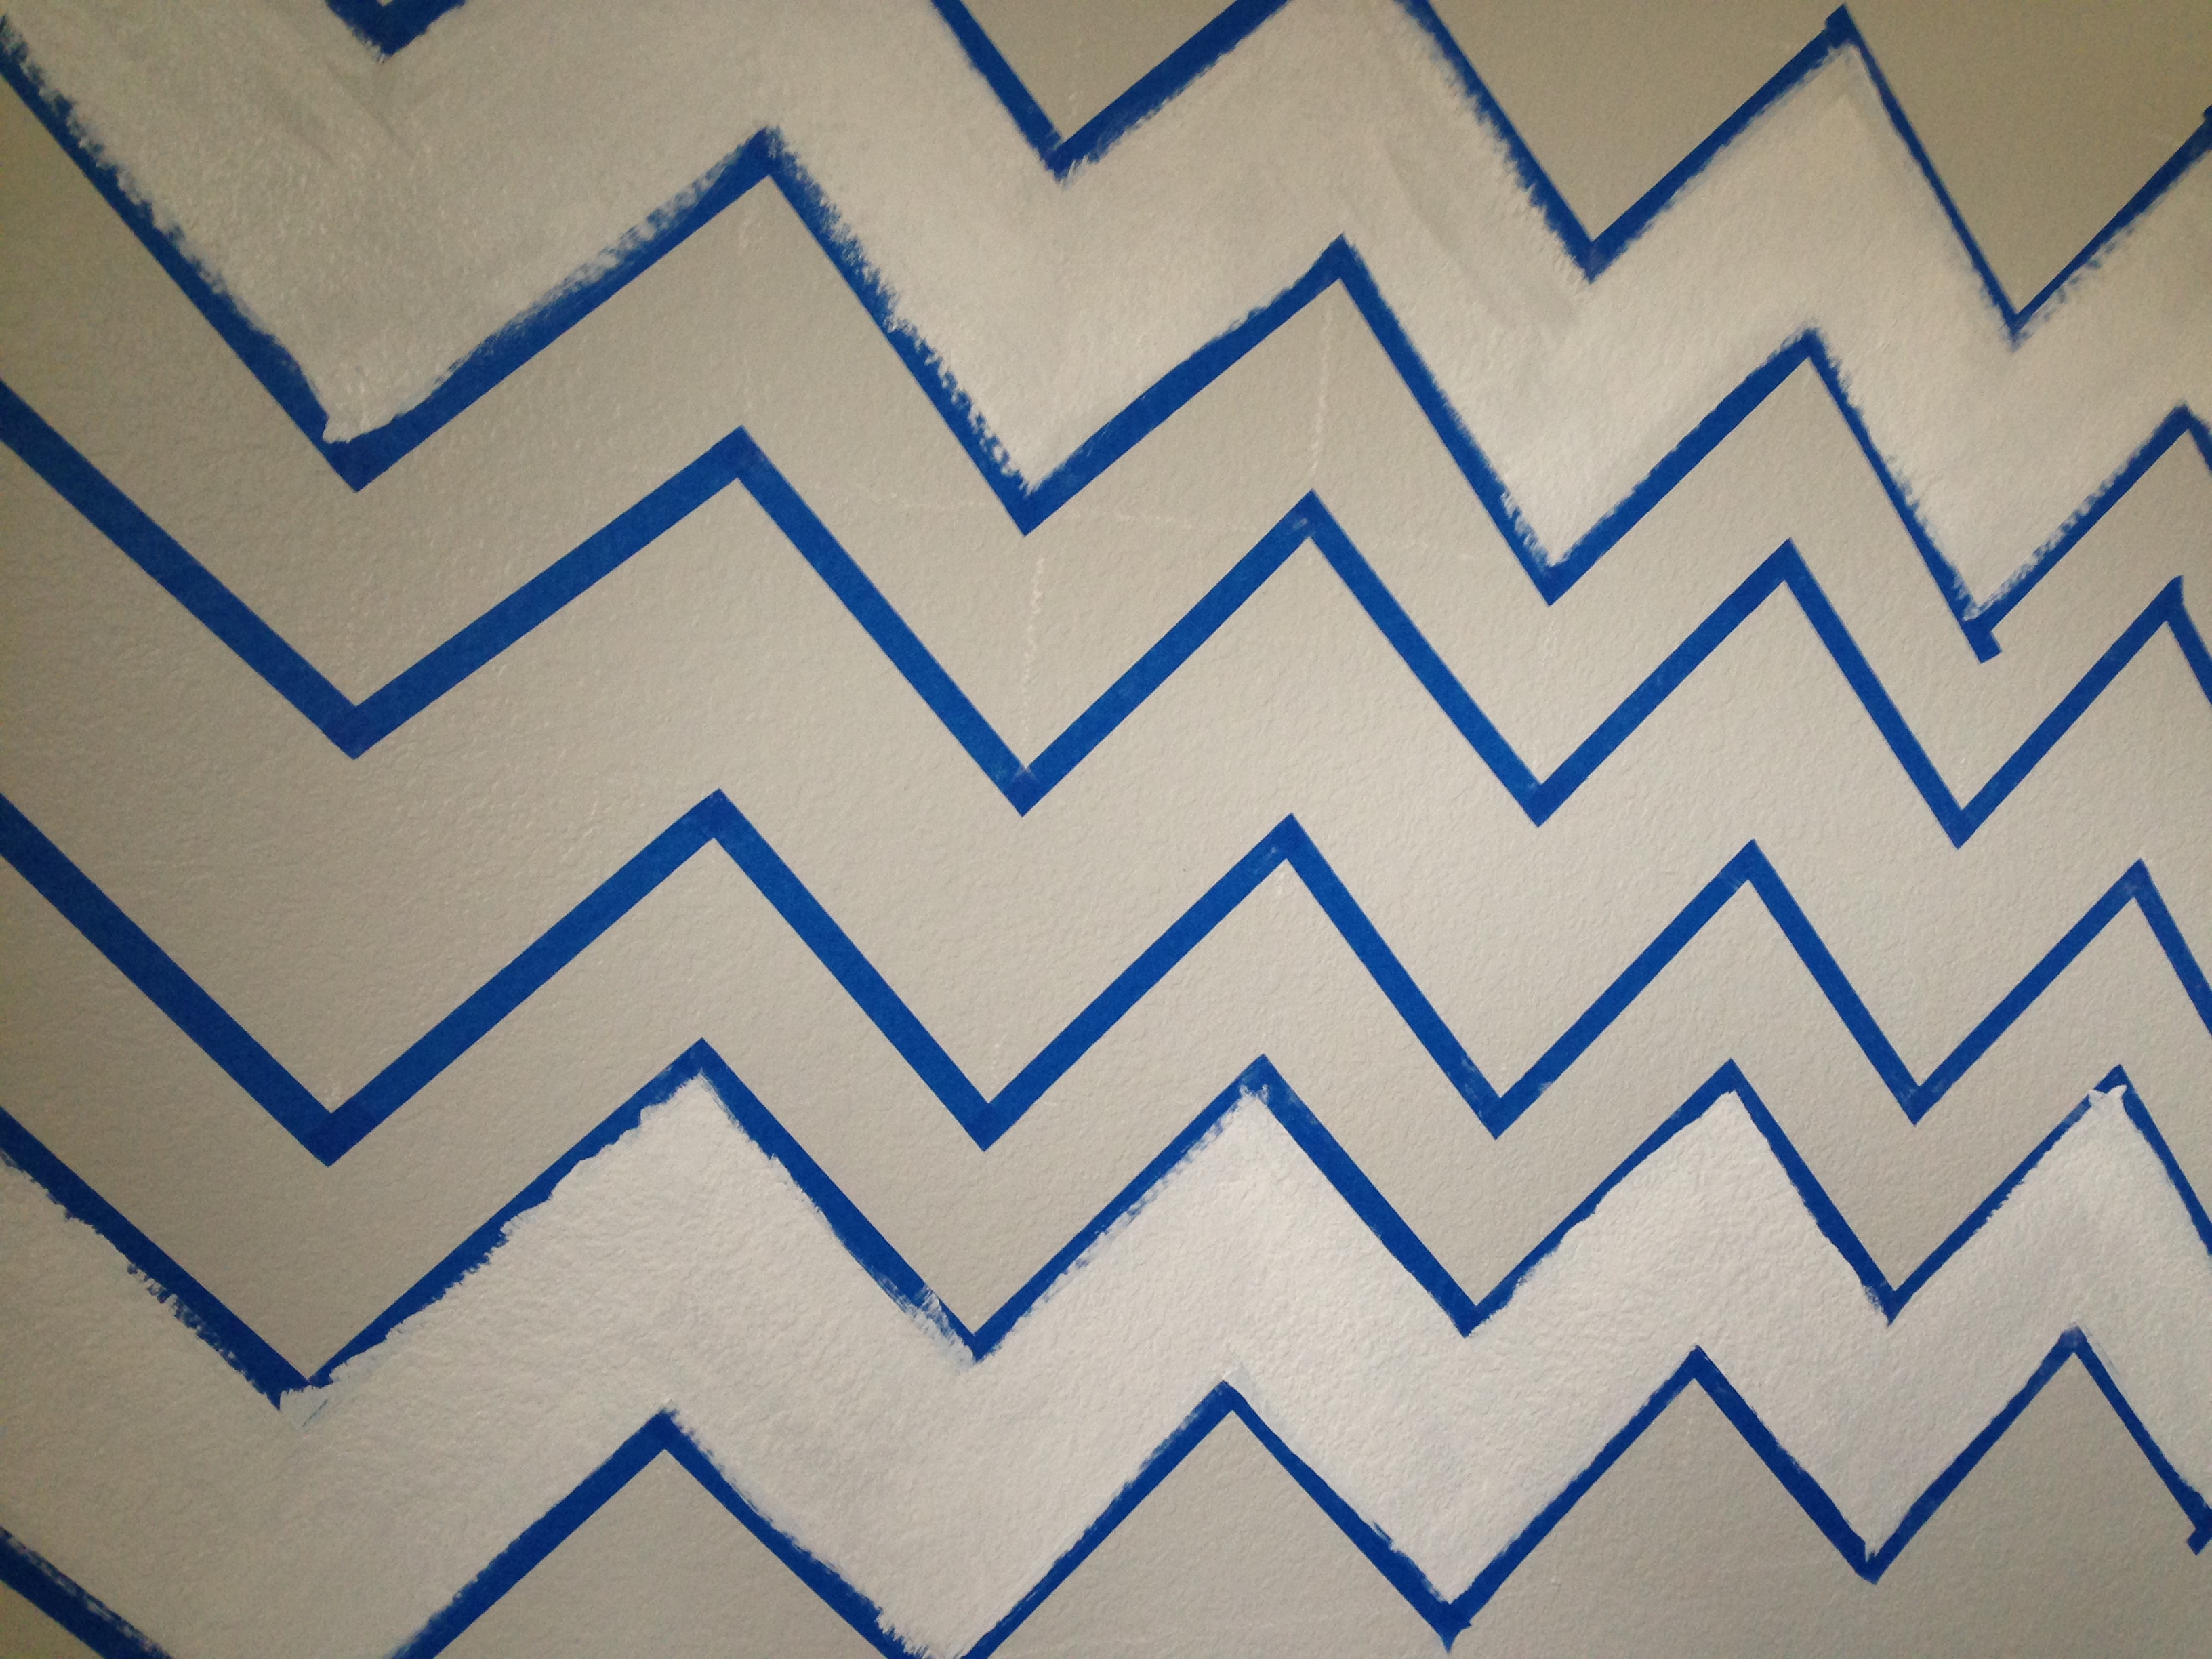
9. I chose to do an accent color in the middle row, you can do as you choose. When you finish painting take the tape off. Don’t wait till the paint is completely dry, do it after 30 minutes of finishing with the painting process.
10. Good news, it is over! Now you have a wonderful accent wall. You can do this on your entryway, your bedroom, or anywhere you want to give more focus to.

To complete Alexander’s room I used the Ikea Stuva system. I wanted to give him a desk to paint and draw in the near future, the other side of the Stuva system I used it as as a storage bench to put away the toys he doesn’t use as often. I also added a cute book storage wall with the help of the Ribba picture ledge. Then the finishing touch was a teepee that I purchased at Etsy. It is our reading sanctuary. I put a sheep skin as the teepee’s floor, it’s Alexander’s favorite element of his bedroom. He lies down on it as much as he can.


I still want to make some art for his walls as well as finding the prefect rug he can play on. I am changing the carpets next week and I would be devastated to see stains on it on a regular basis. If you have any rug suggestions I would really appreciate them. I have ordered and returned a couple so far!

DIL3. You are amazing! So talented!!! It all looks fabulous, AND it is so well planned and functional! Very impressive, and Alexander is a lucky little guy! Your proud MIL!
Sent from my iPad
>