My mother has always been of the idea that family pictures are private, not something very 21st century like 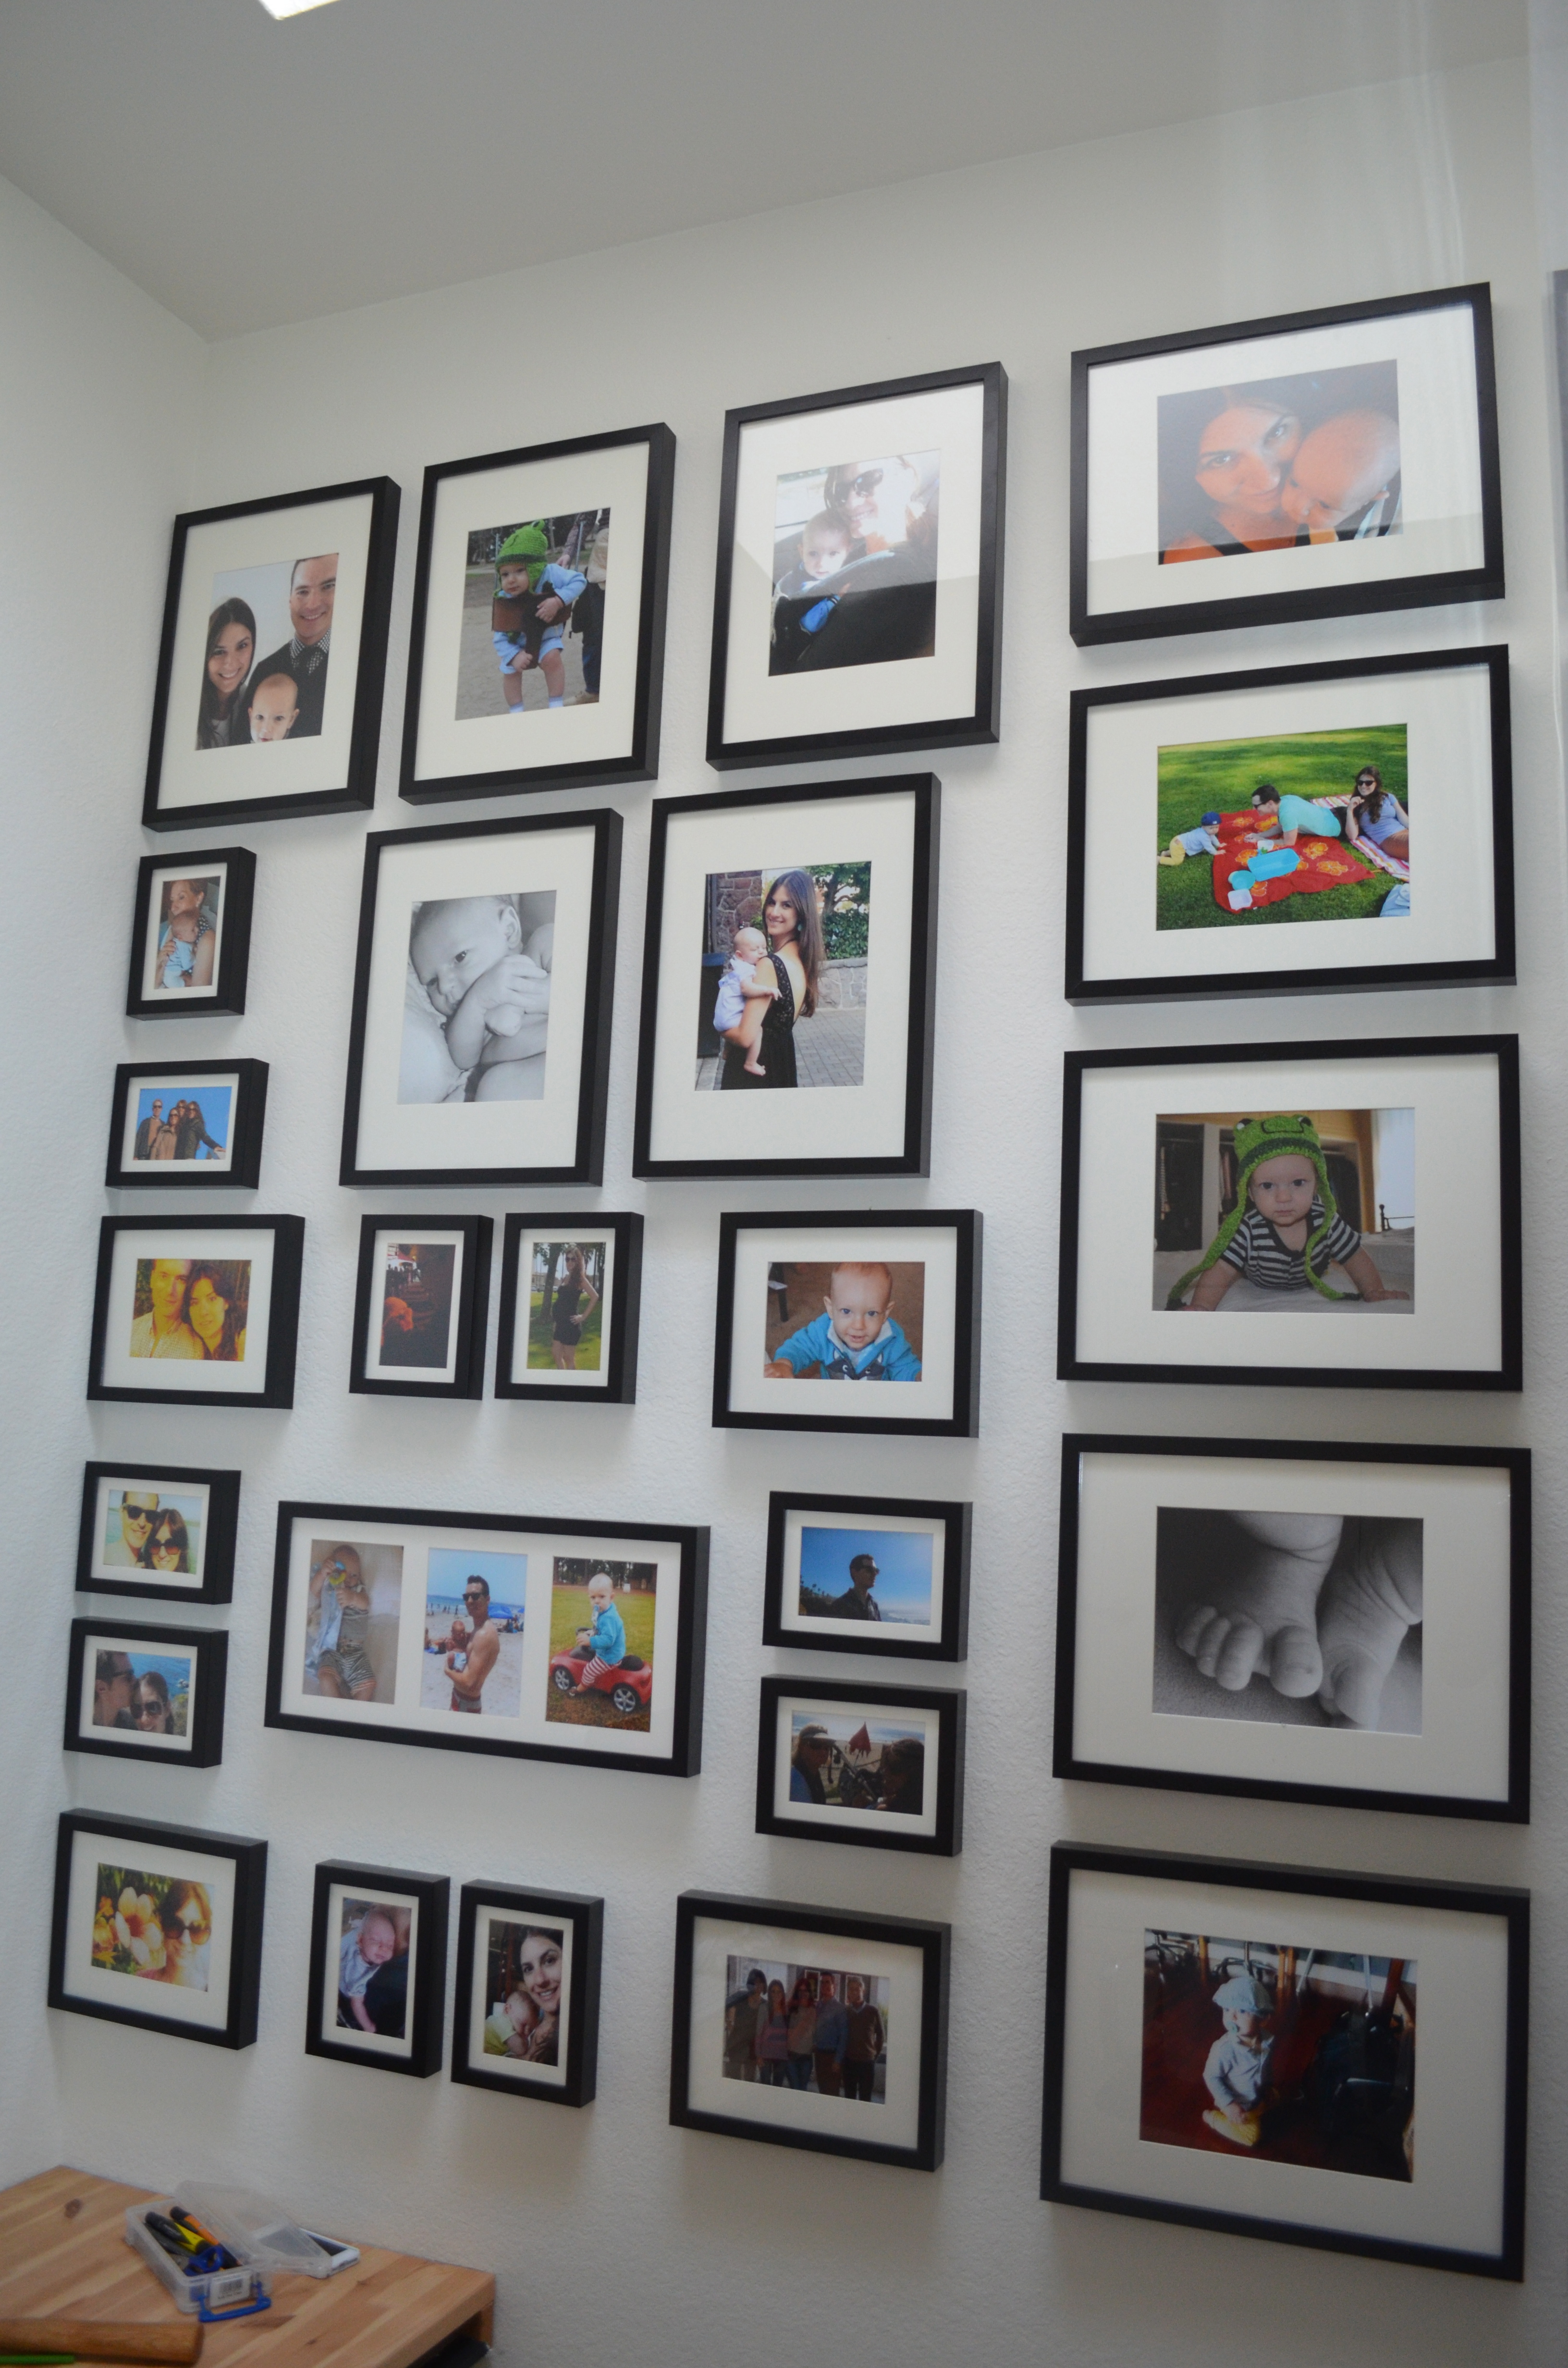 right? Well, growing up we never had pictures in the social areas of our house (she has a pretty amazing art collection I must say). For these private treasures my mom created something she calls the “family wall”. She chose a private room in the house, her home library, and hung all the pictures of the special people that have touched her life. There’s pictures of her grandparents, parents, our beloved neighbor that passed away, her family in Spain and so forth. I love it when she tells me the stories of all these special people as she points to their photos.
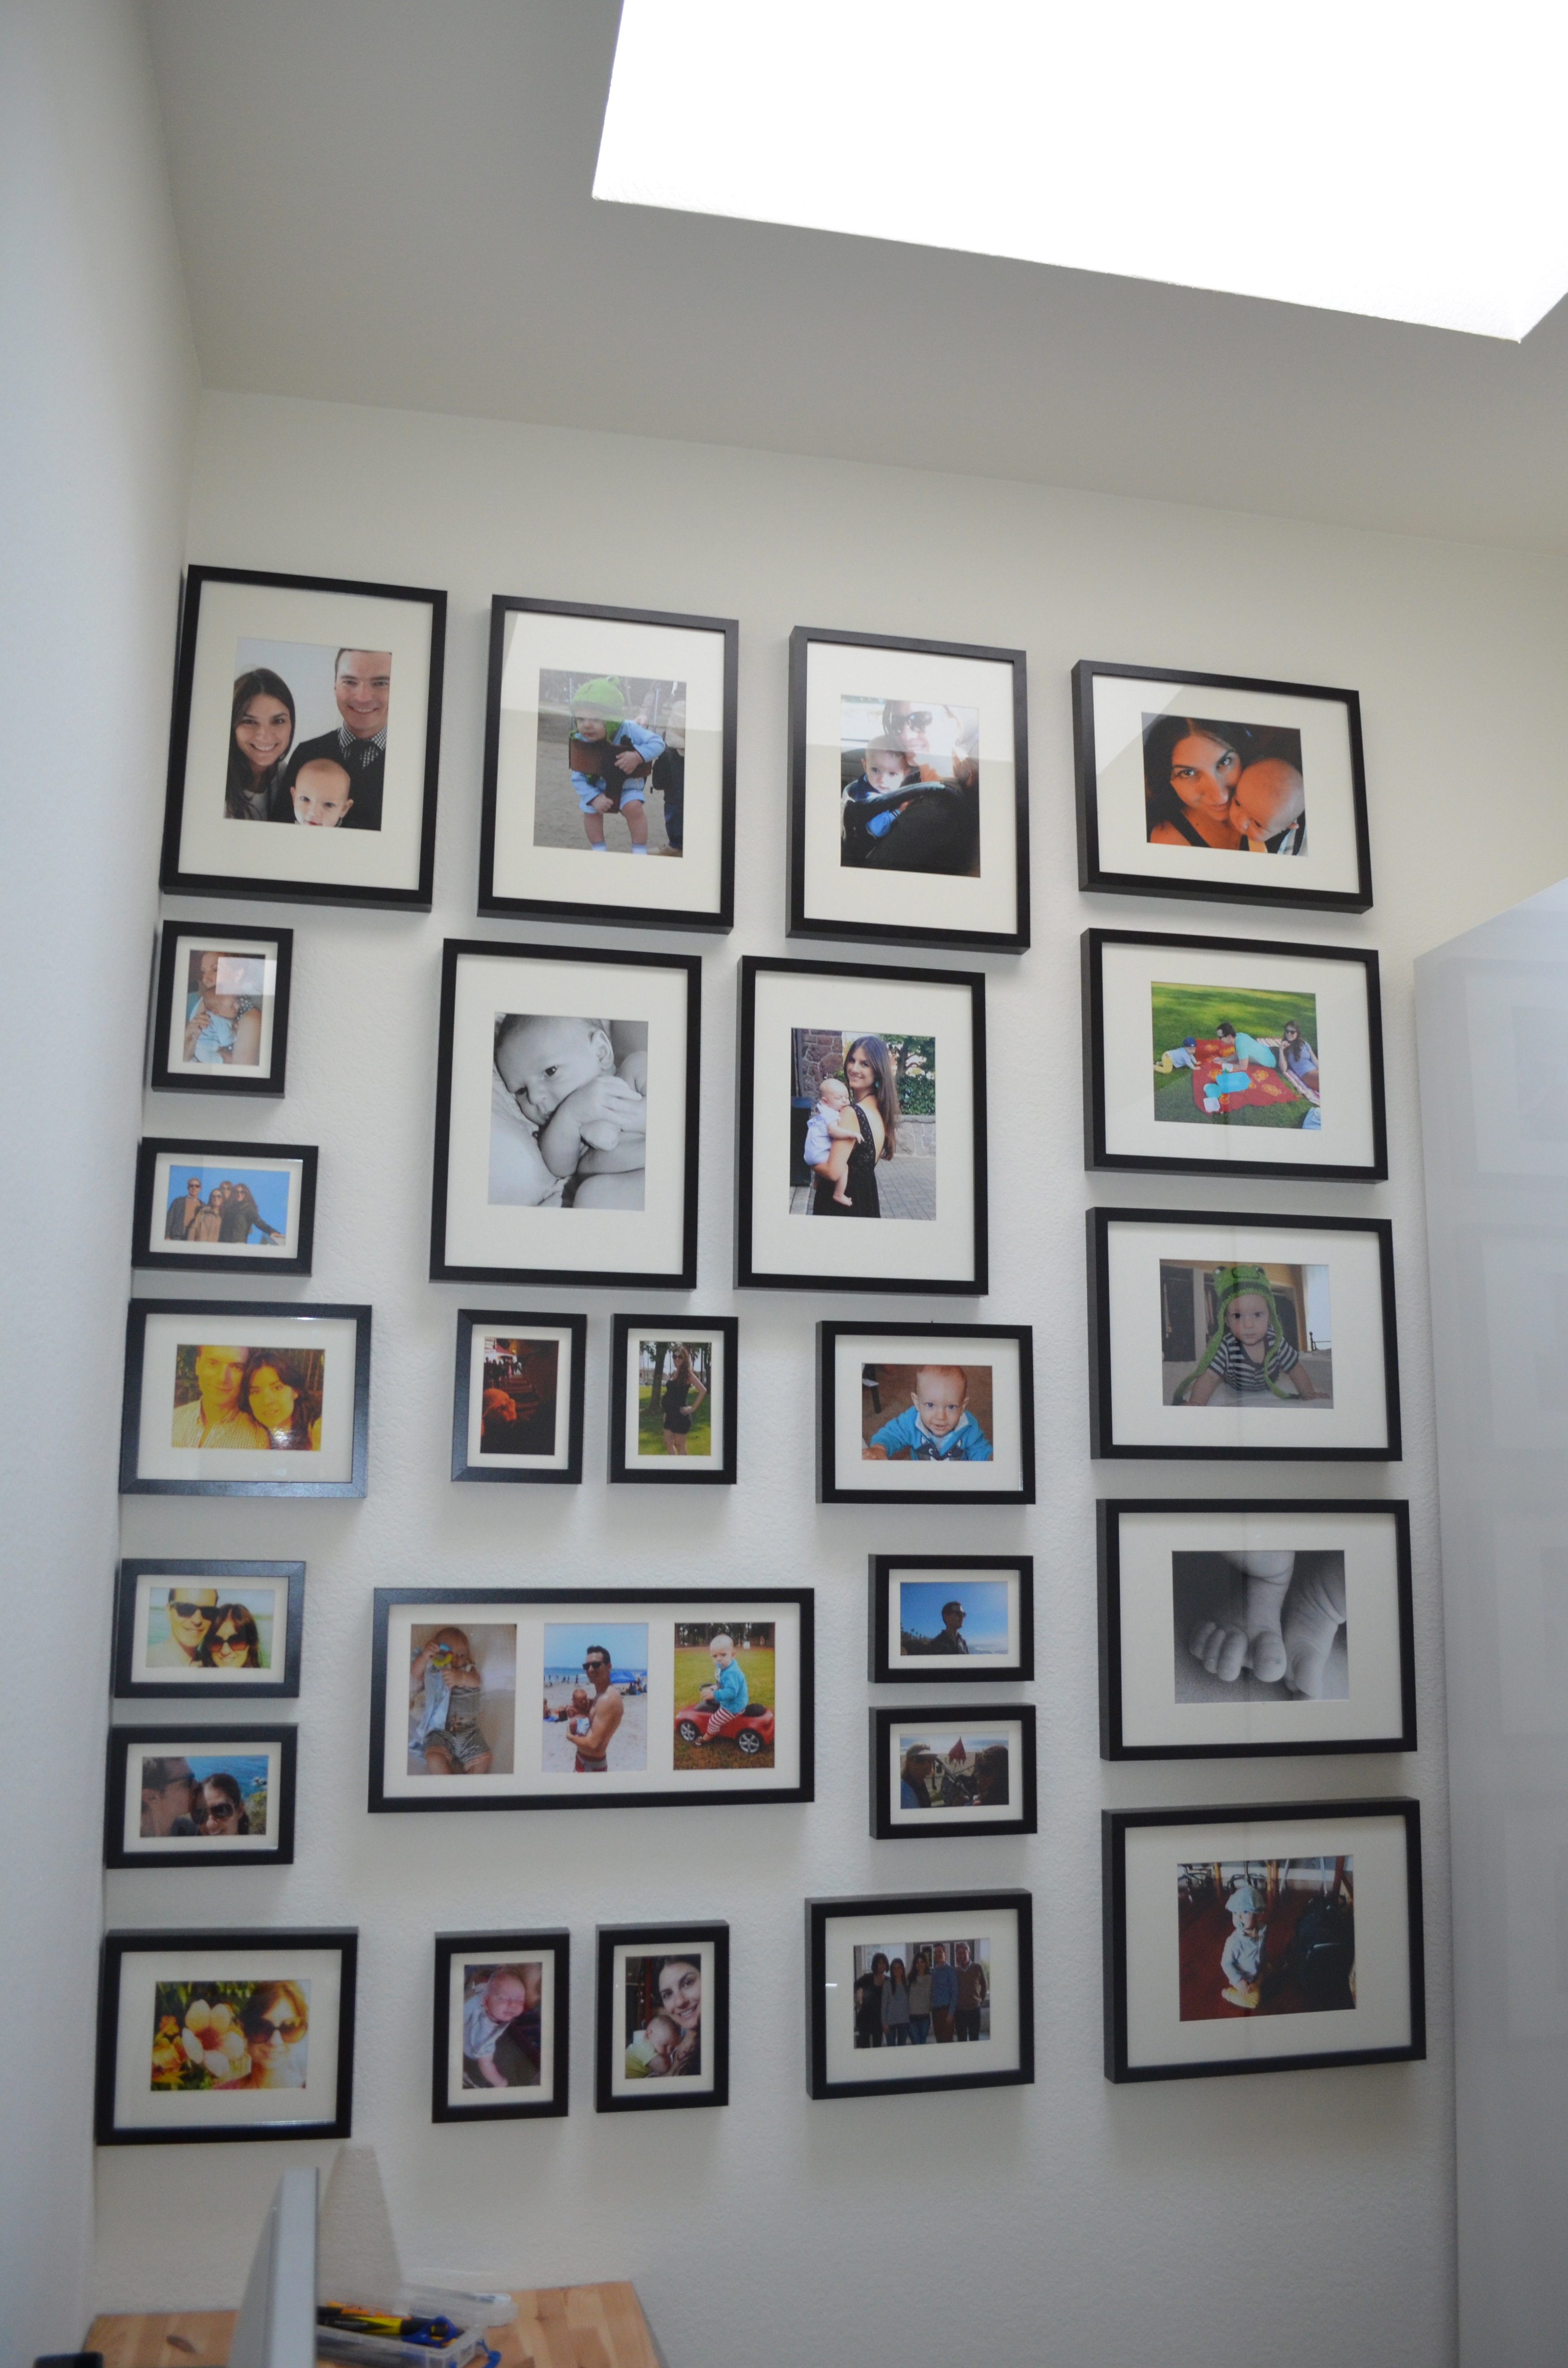
Now that I am decorating our home, Adam and I decided we wanted to copy her and create our own “family wall”. Following the principles of the original family wall I also wanted a private area for the family pictures, so I chose our home office. I wanted a large wall to exhibit all the pictures in an organized yet modern way.
I went ahead and chose a about 25 pictures I really liked, then had them printed in different sizes: 4×6, 5×7 and 8×10. I ordered them on the Wallgreens website—after doing some research they were priced the best. I admit they don’t have the best quality, so you might choose to invest in better prints at your local photo store.
I wasn’t sure what color of frames I wanted, but I knew I wanted all to look the same. To avoid regrets I went with black—our walls are white so I figured they will stand out nicely. I went to Ikea to look for frames and they had all the sizes I needed—I have to say I was really tempted by their red frames but I was afraid of regretting my decision. Between the prints and all the frames I spent right about $200.00! Pretty amazing.
When I moved to my first apartment my mother came to visit and taught me how to hang a group of pictures on the wall. I have followed this advice in my subsequent apartments being pleased with the result every time. Now I want to share her advice with you.
1. Find a large floor area about the size of the wall you will work with.
2. Lay the pictures in many different ways until you find the perfect design.
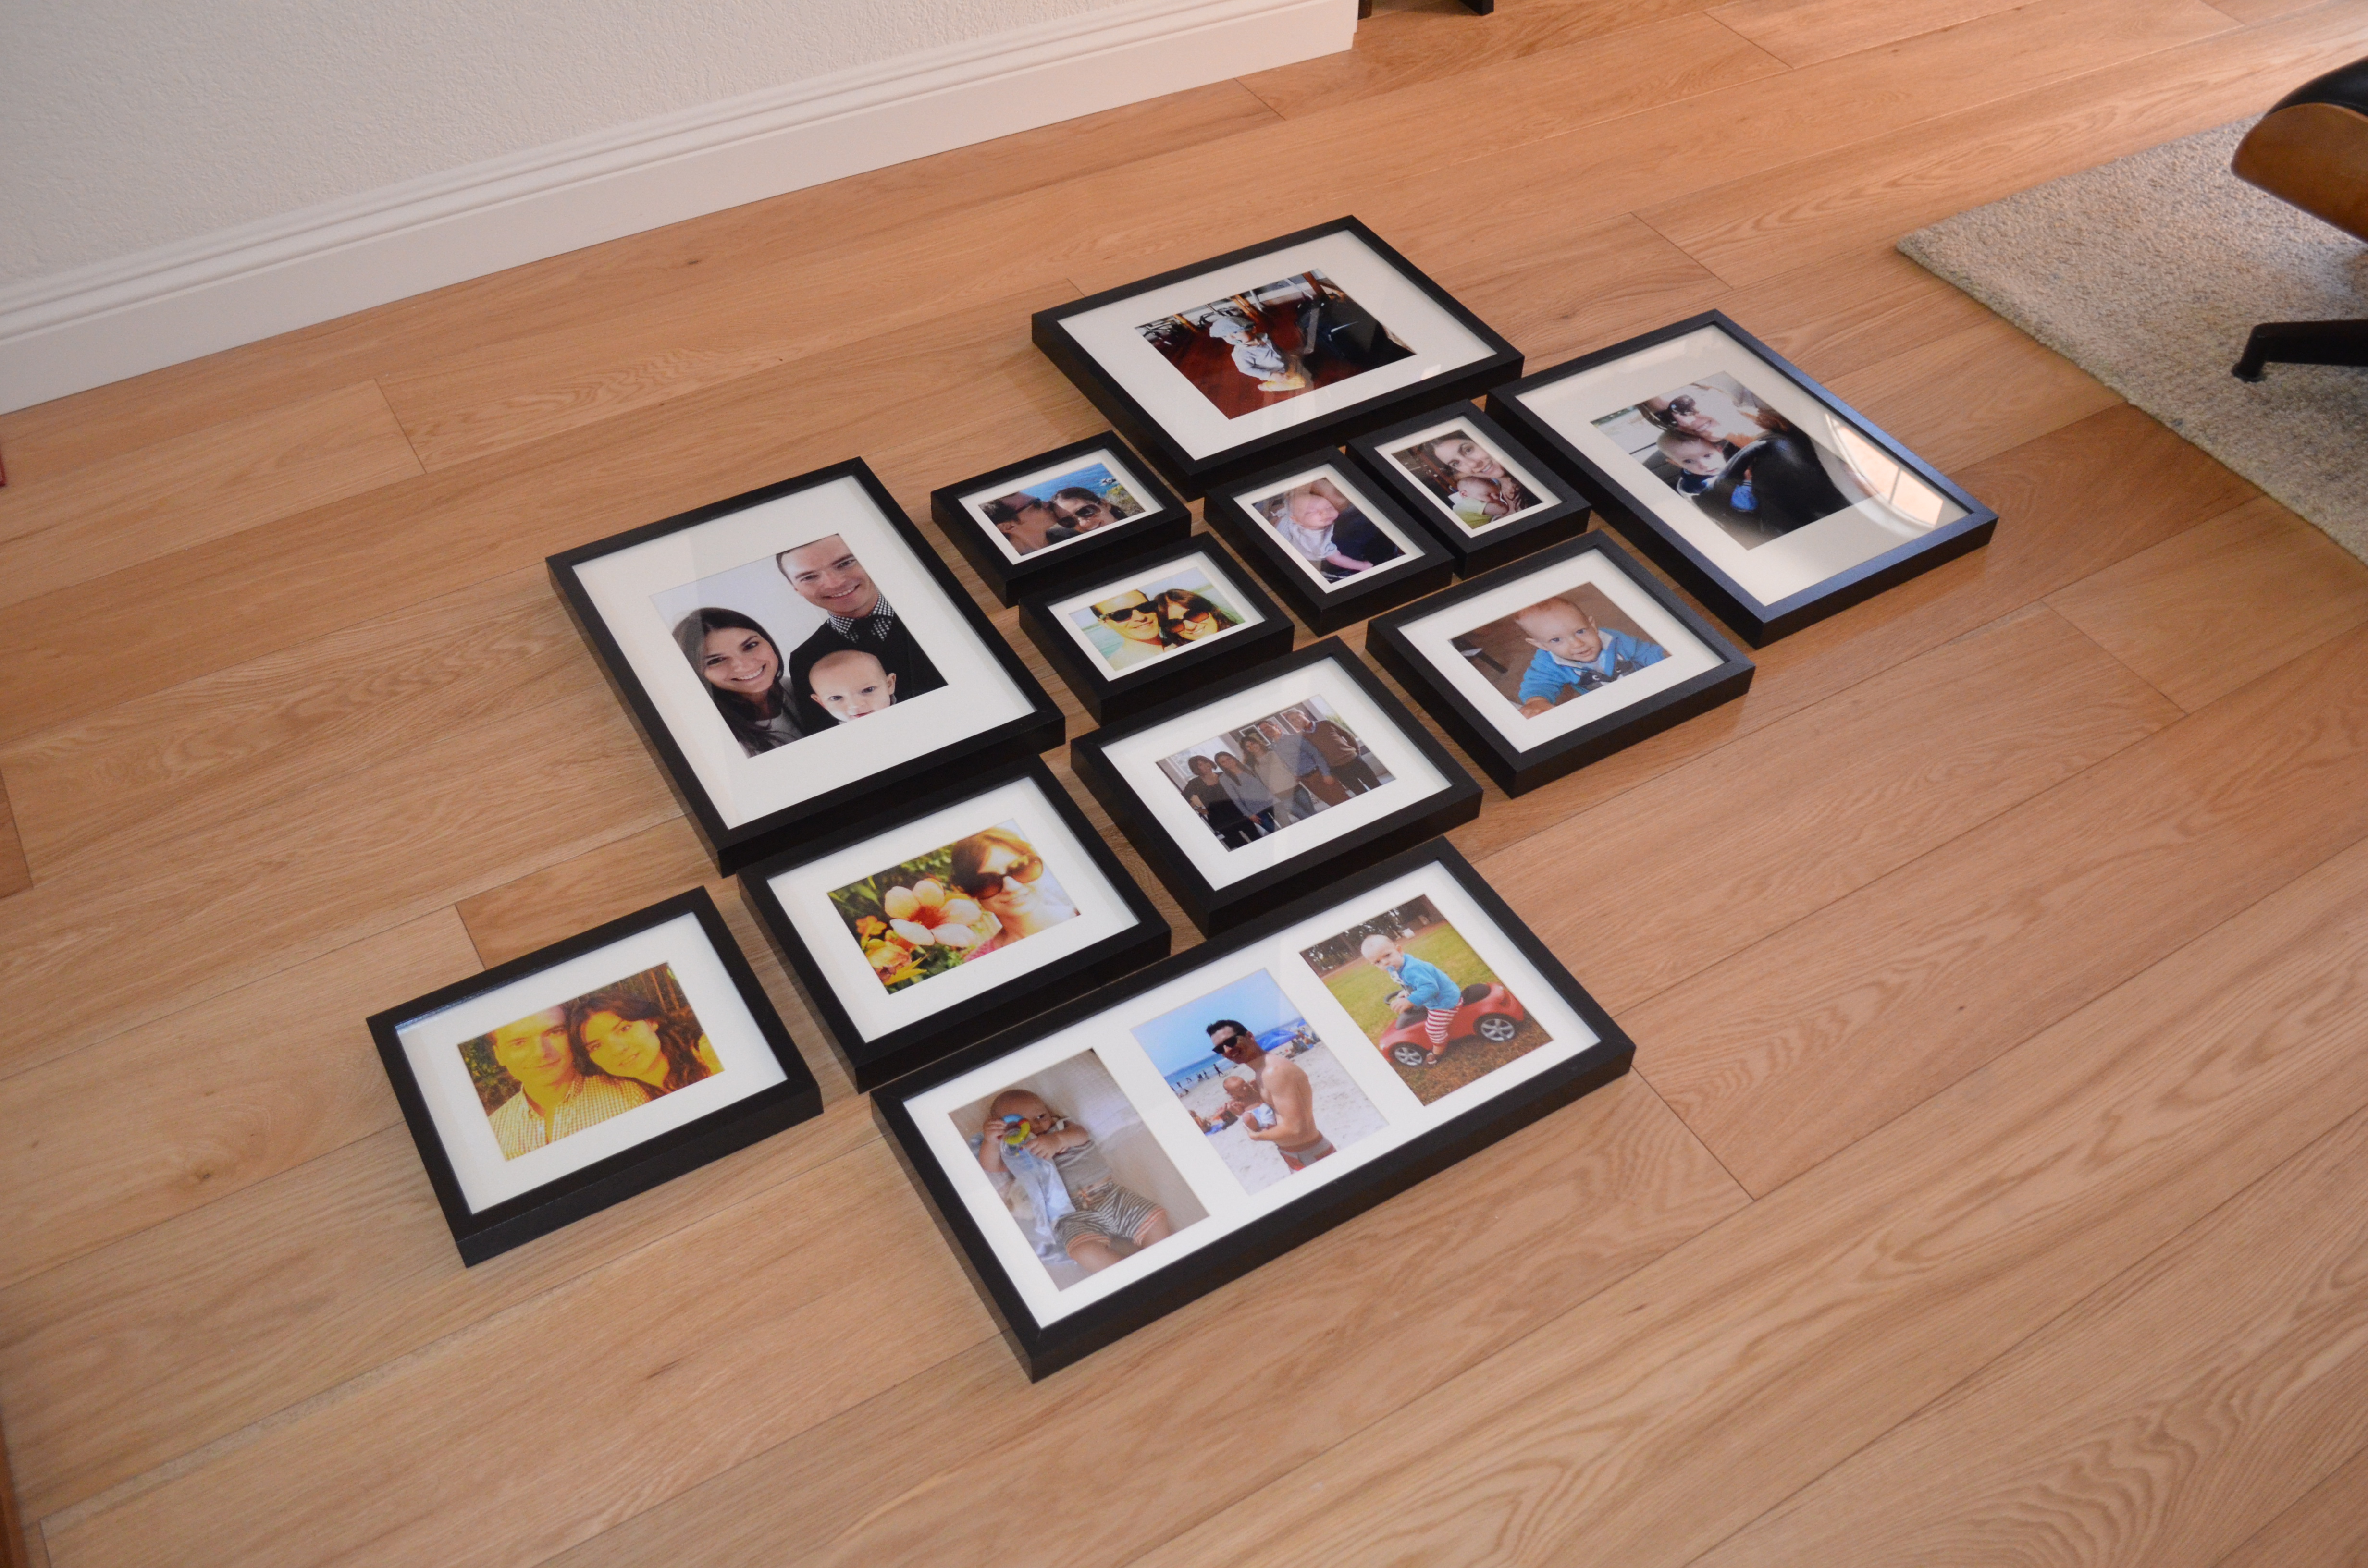

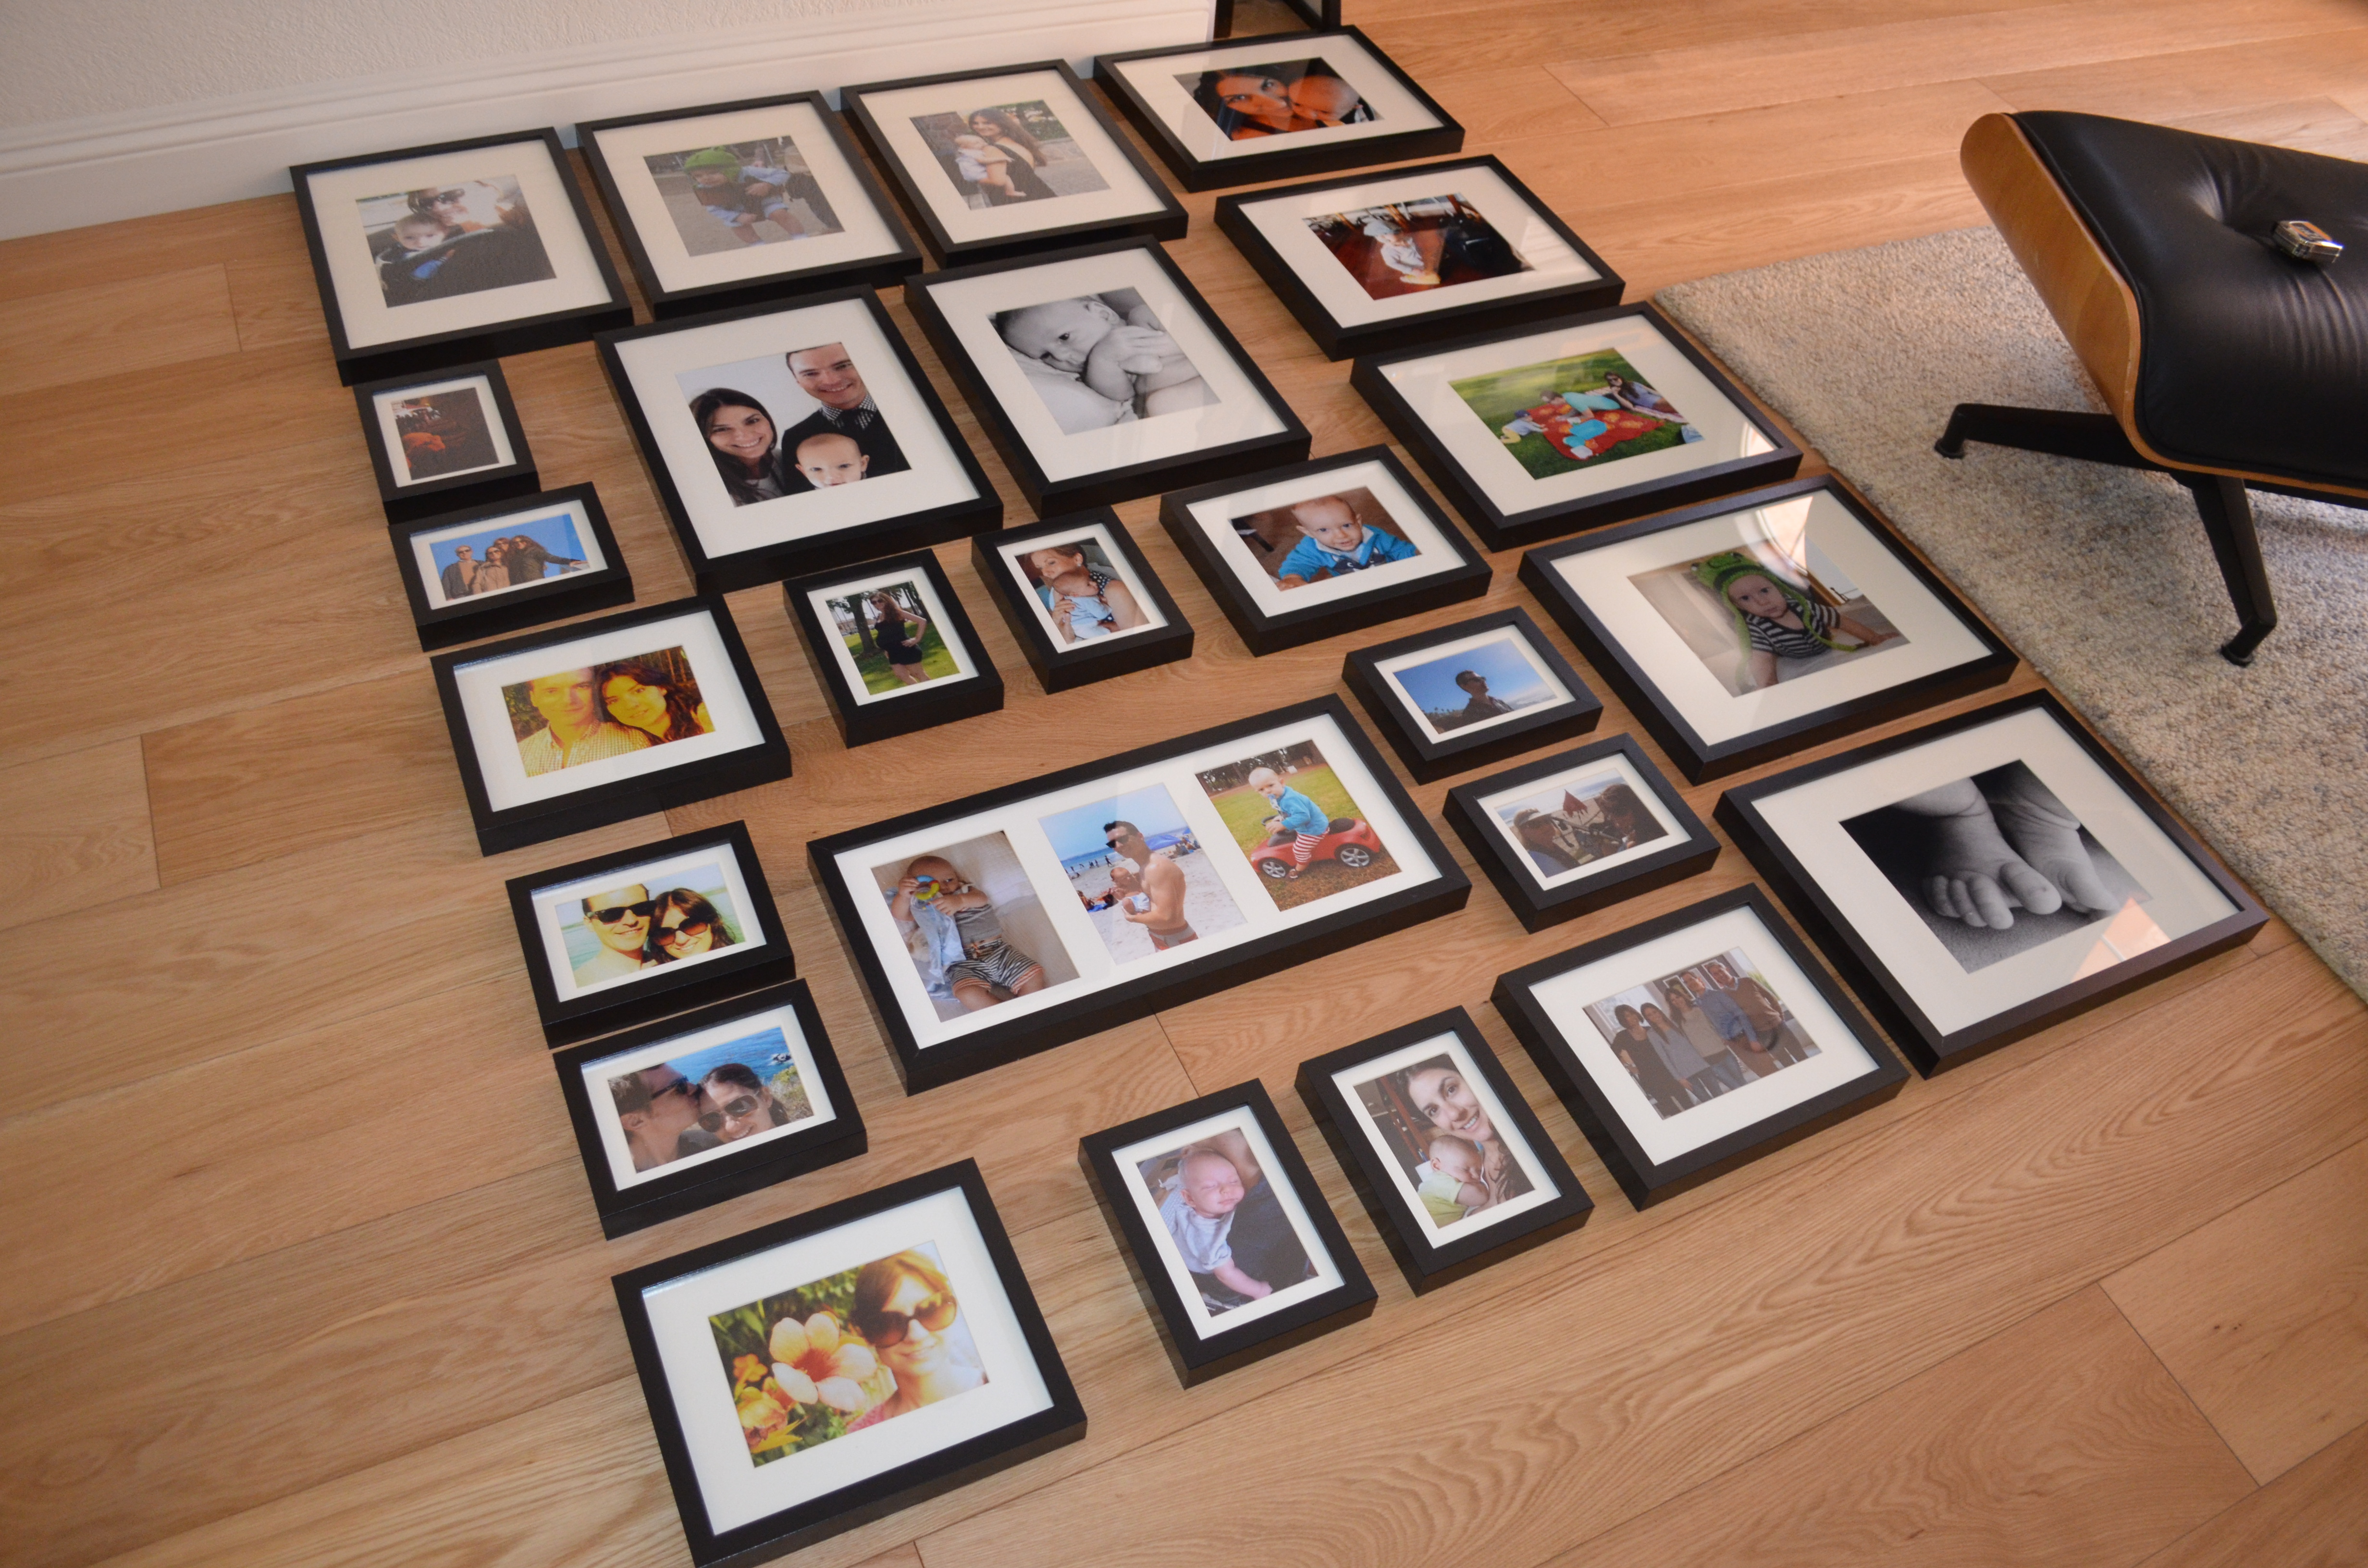
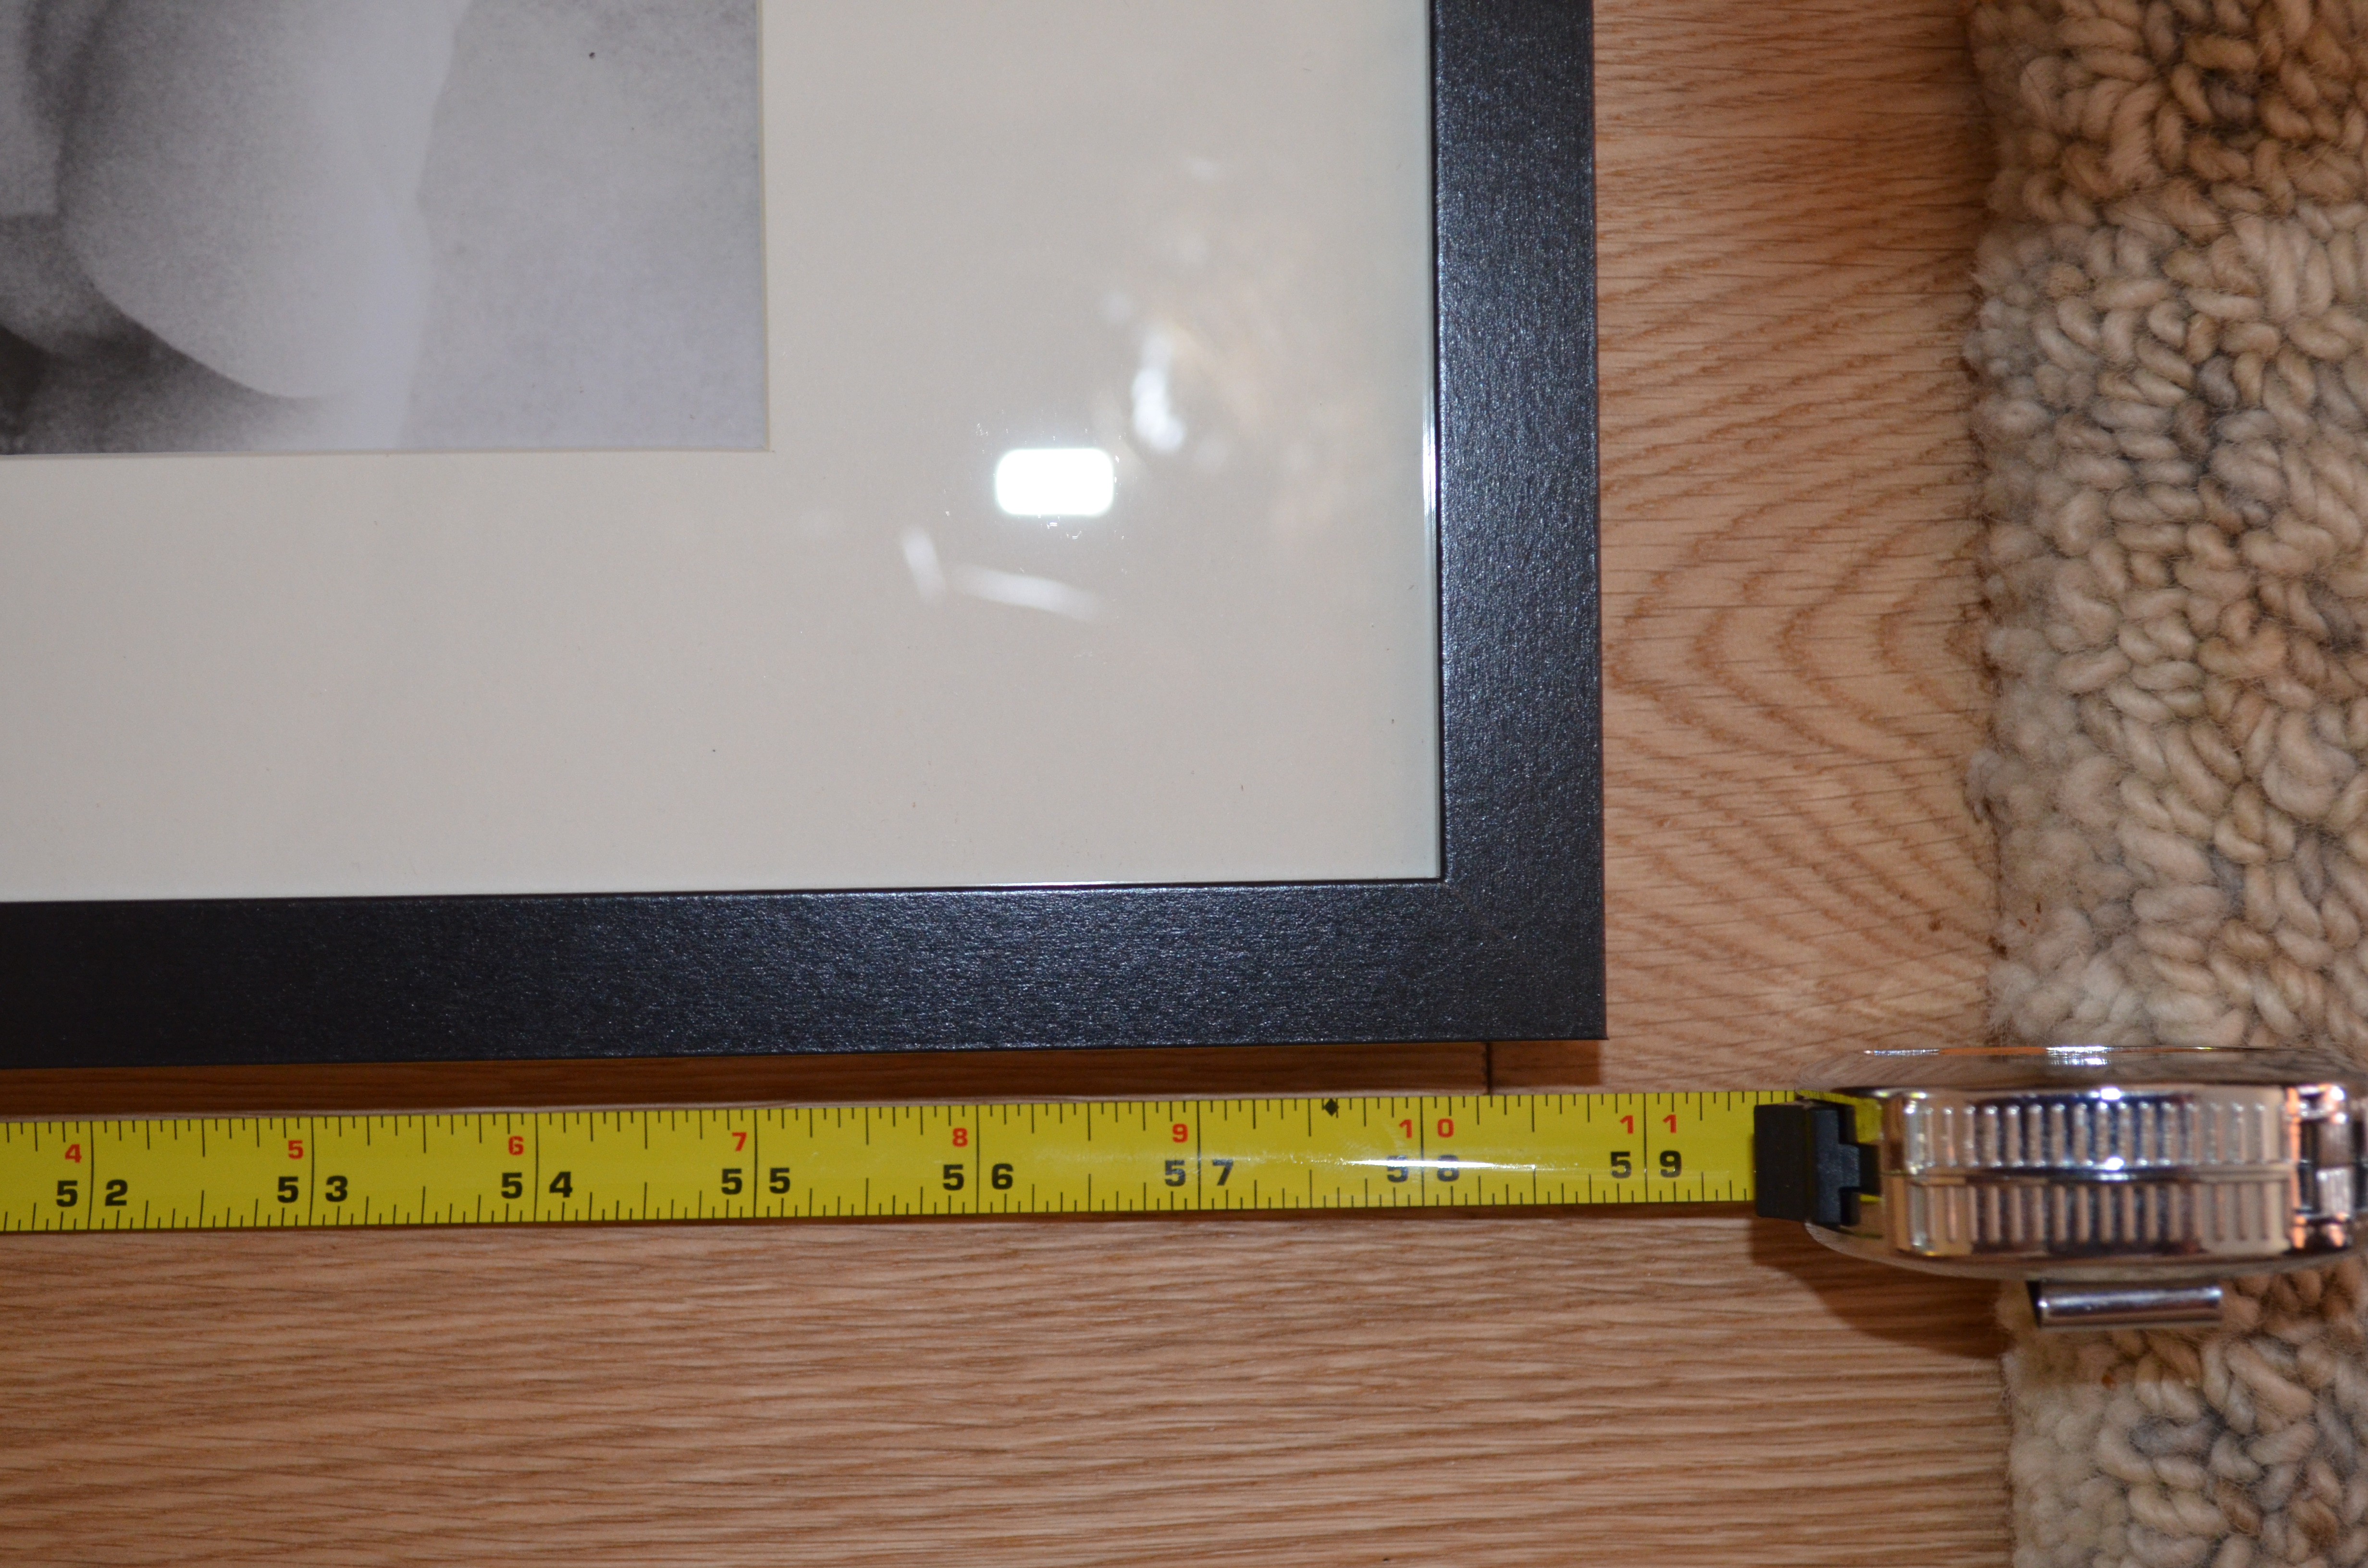
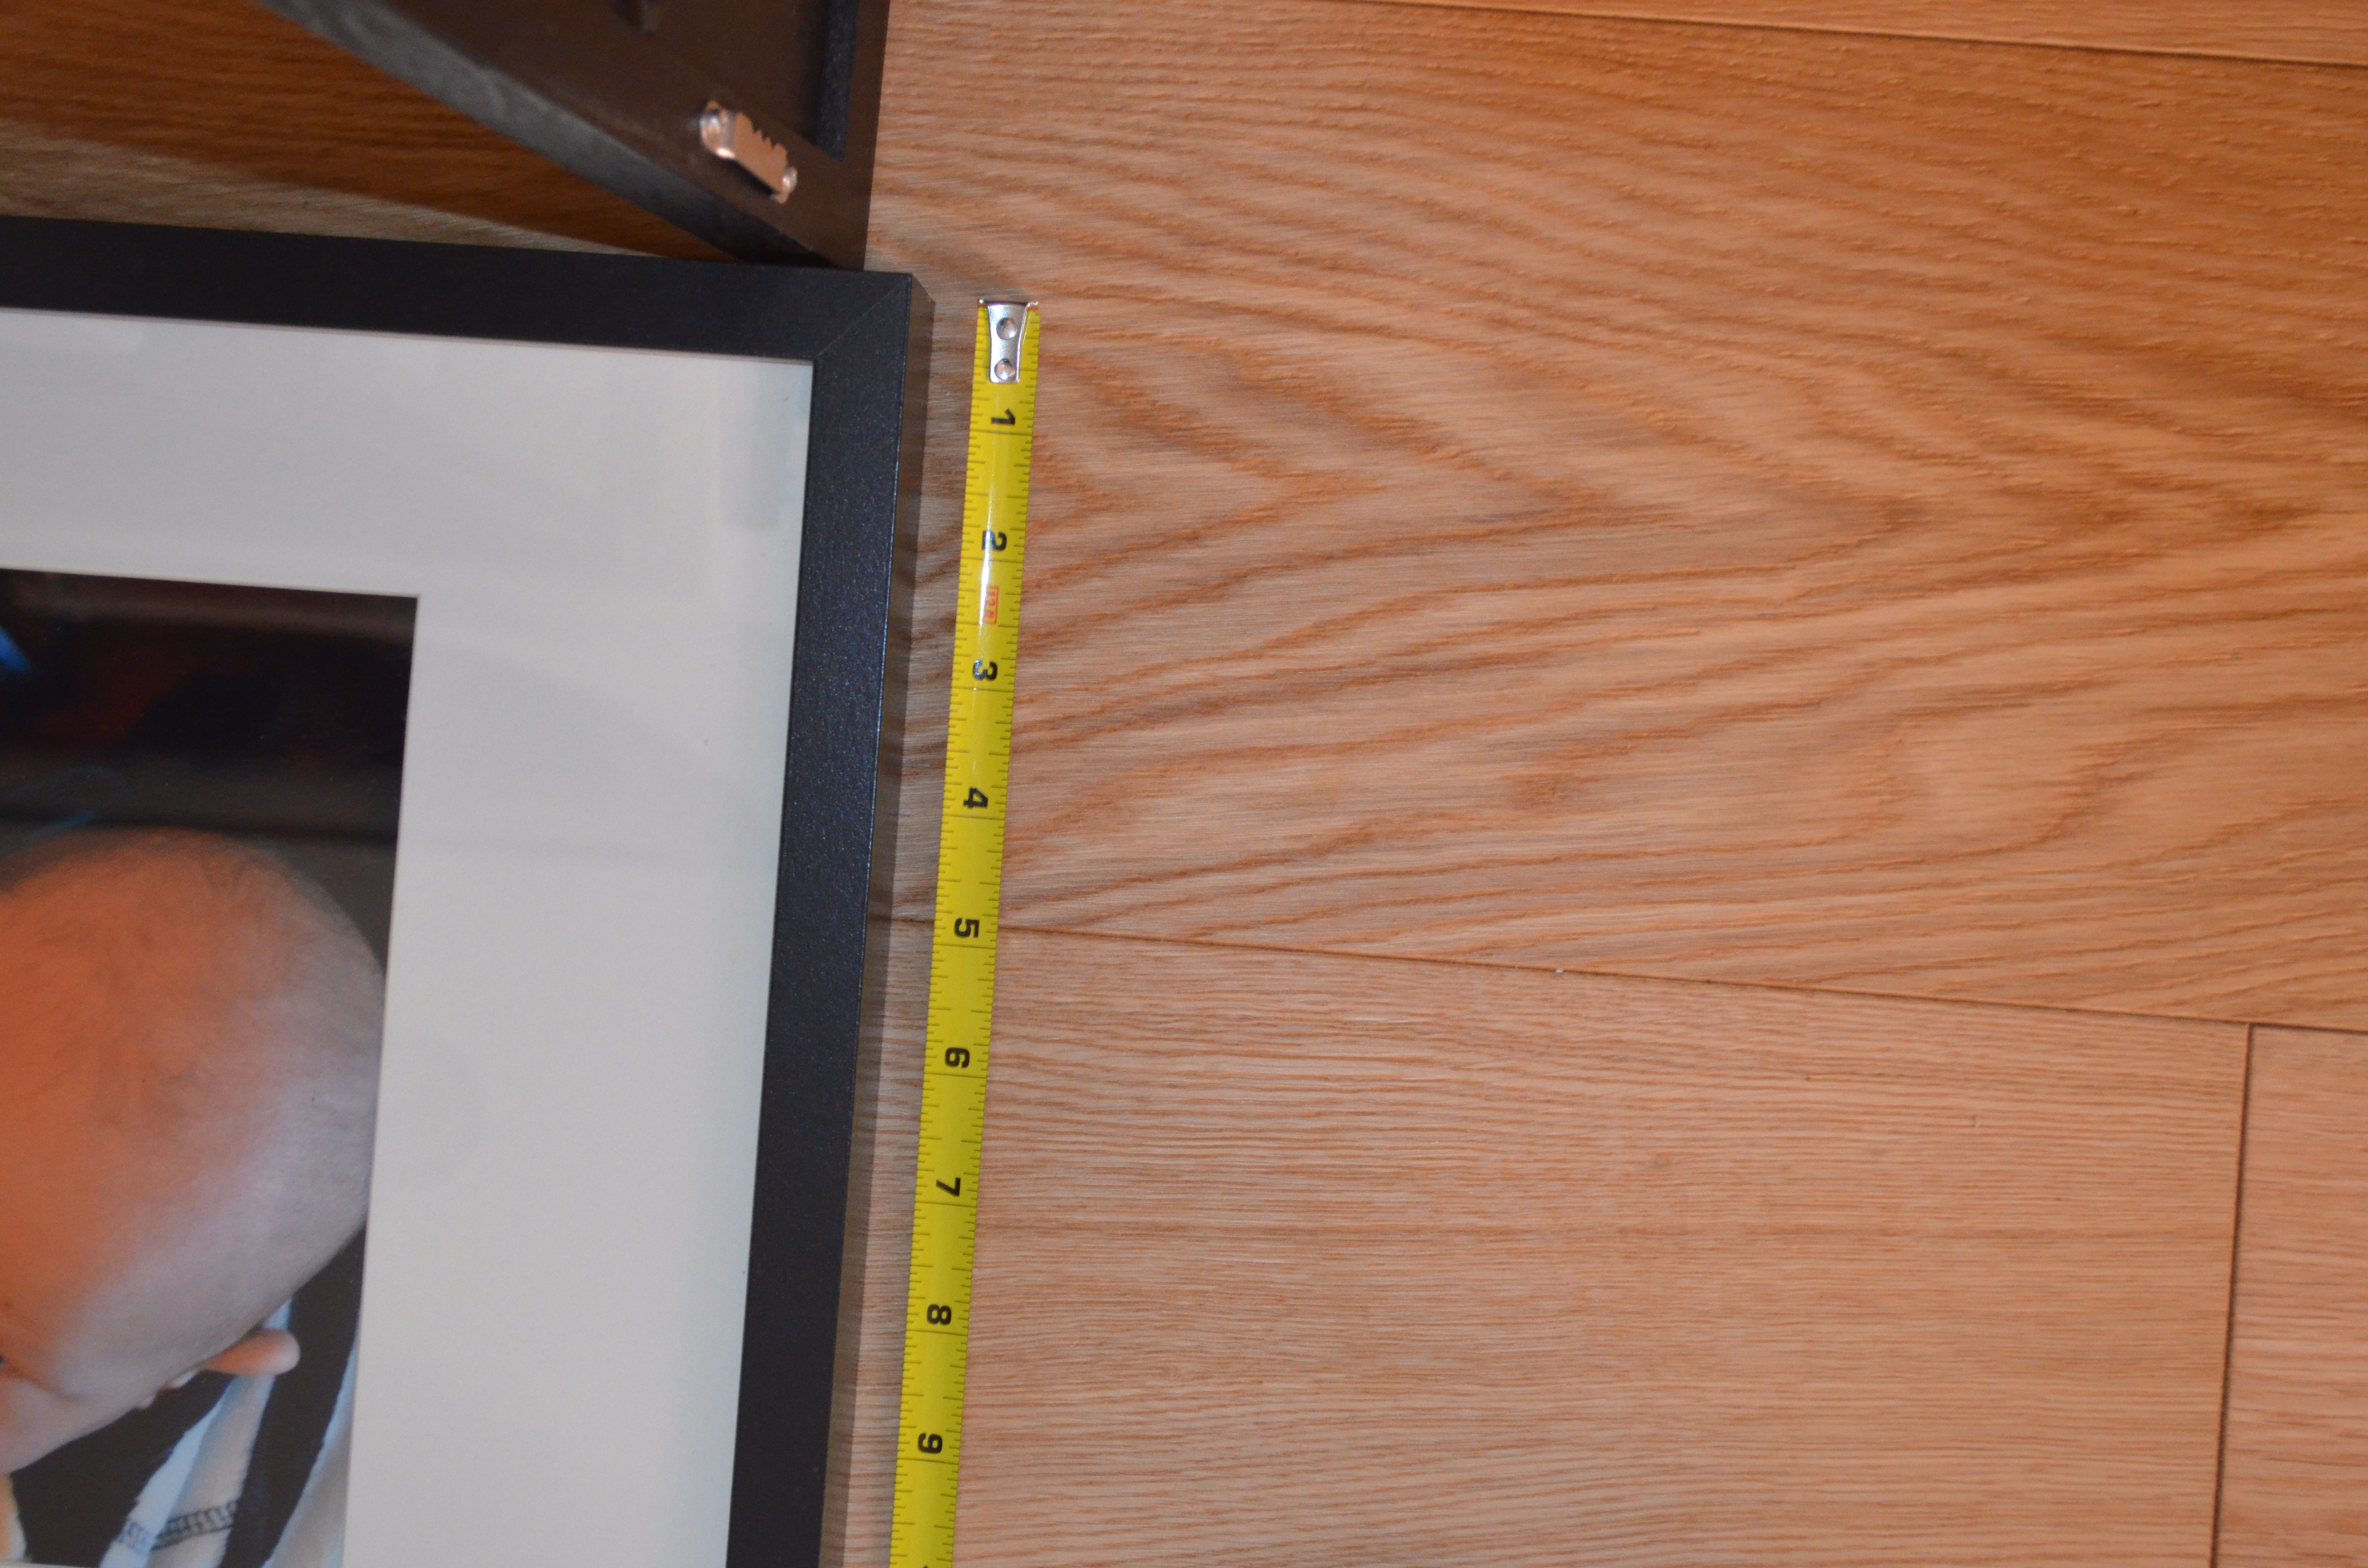
3. Measure every bit of it so you can translate your display to your wall.

4. Take pictures of the floor display so you won’t forget any of it.


5. Ask a friend (or husband) to help you hang the pictures. It is so much easier when you can see from a distance what its being done so you can be more precise.
6. Tap, tap, tap!
I hope you all have a great week!
Tip:
If you choose Ikea frames they come with a metal line to hang them. Try to put the metal line as close to the frame as possible to make it easier for you to calculate where to tap the nail.

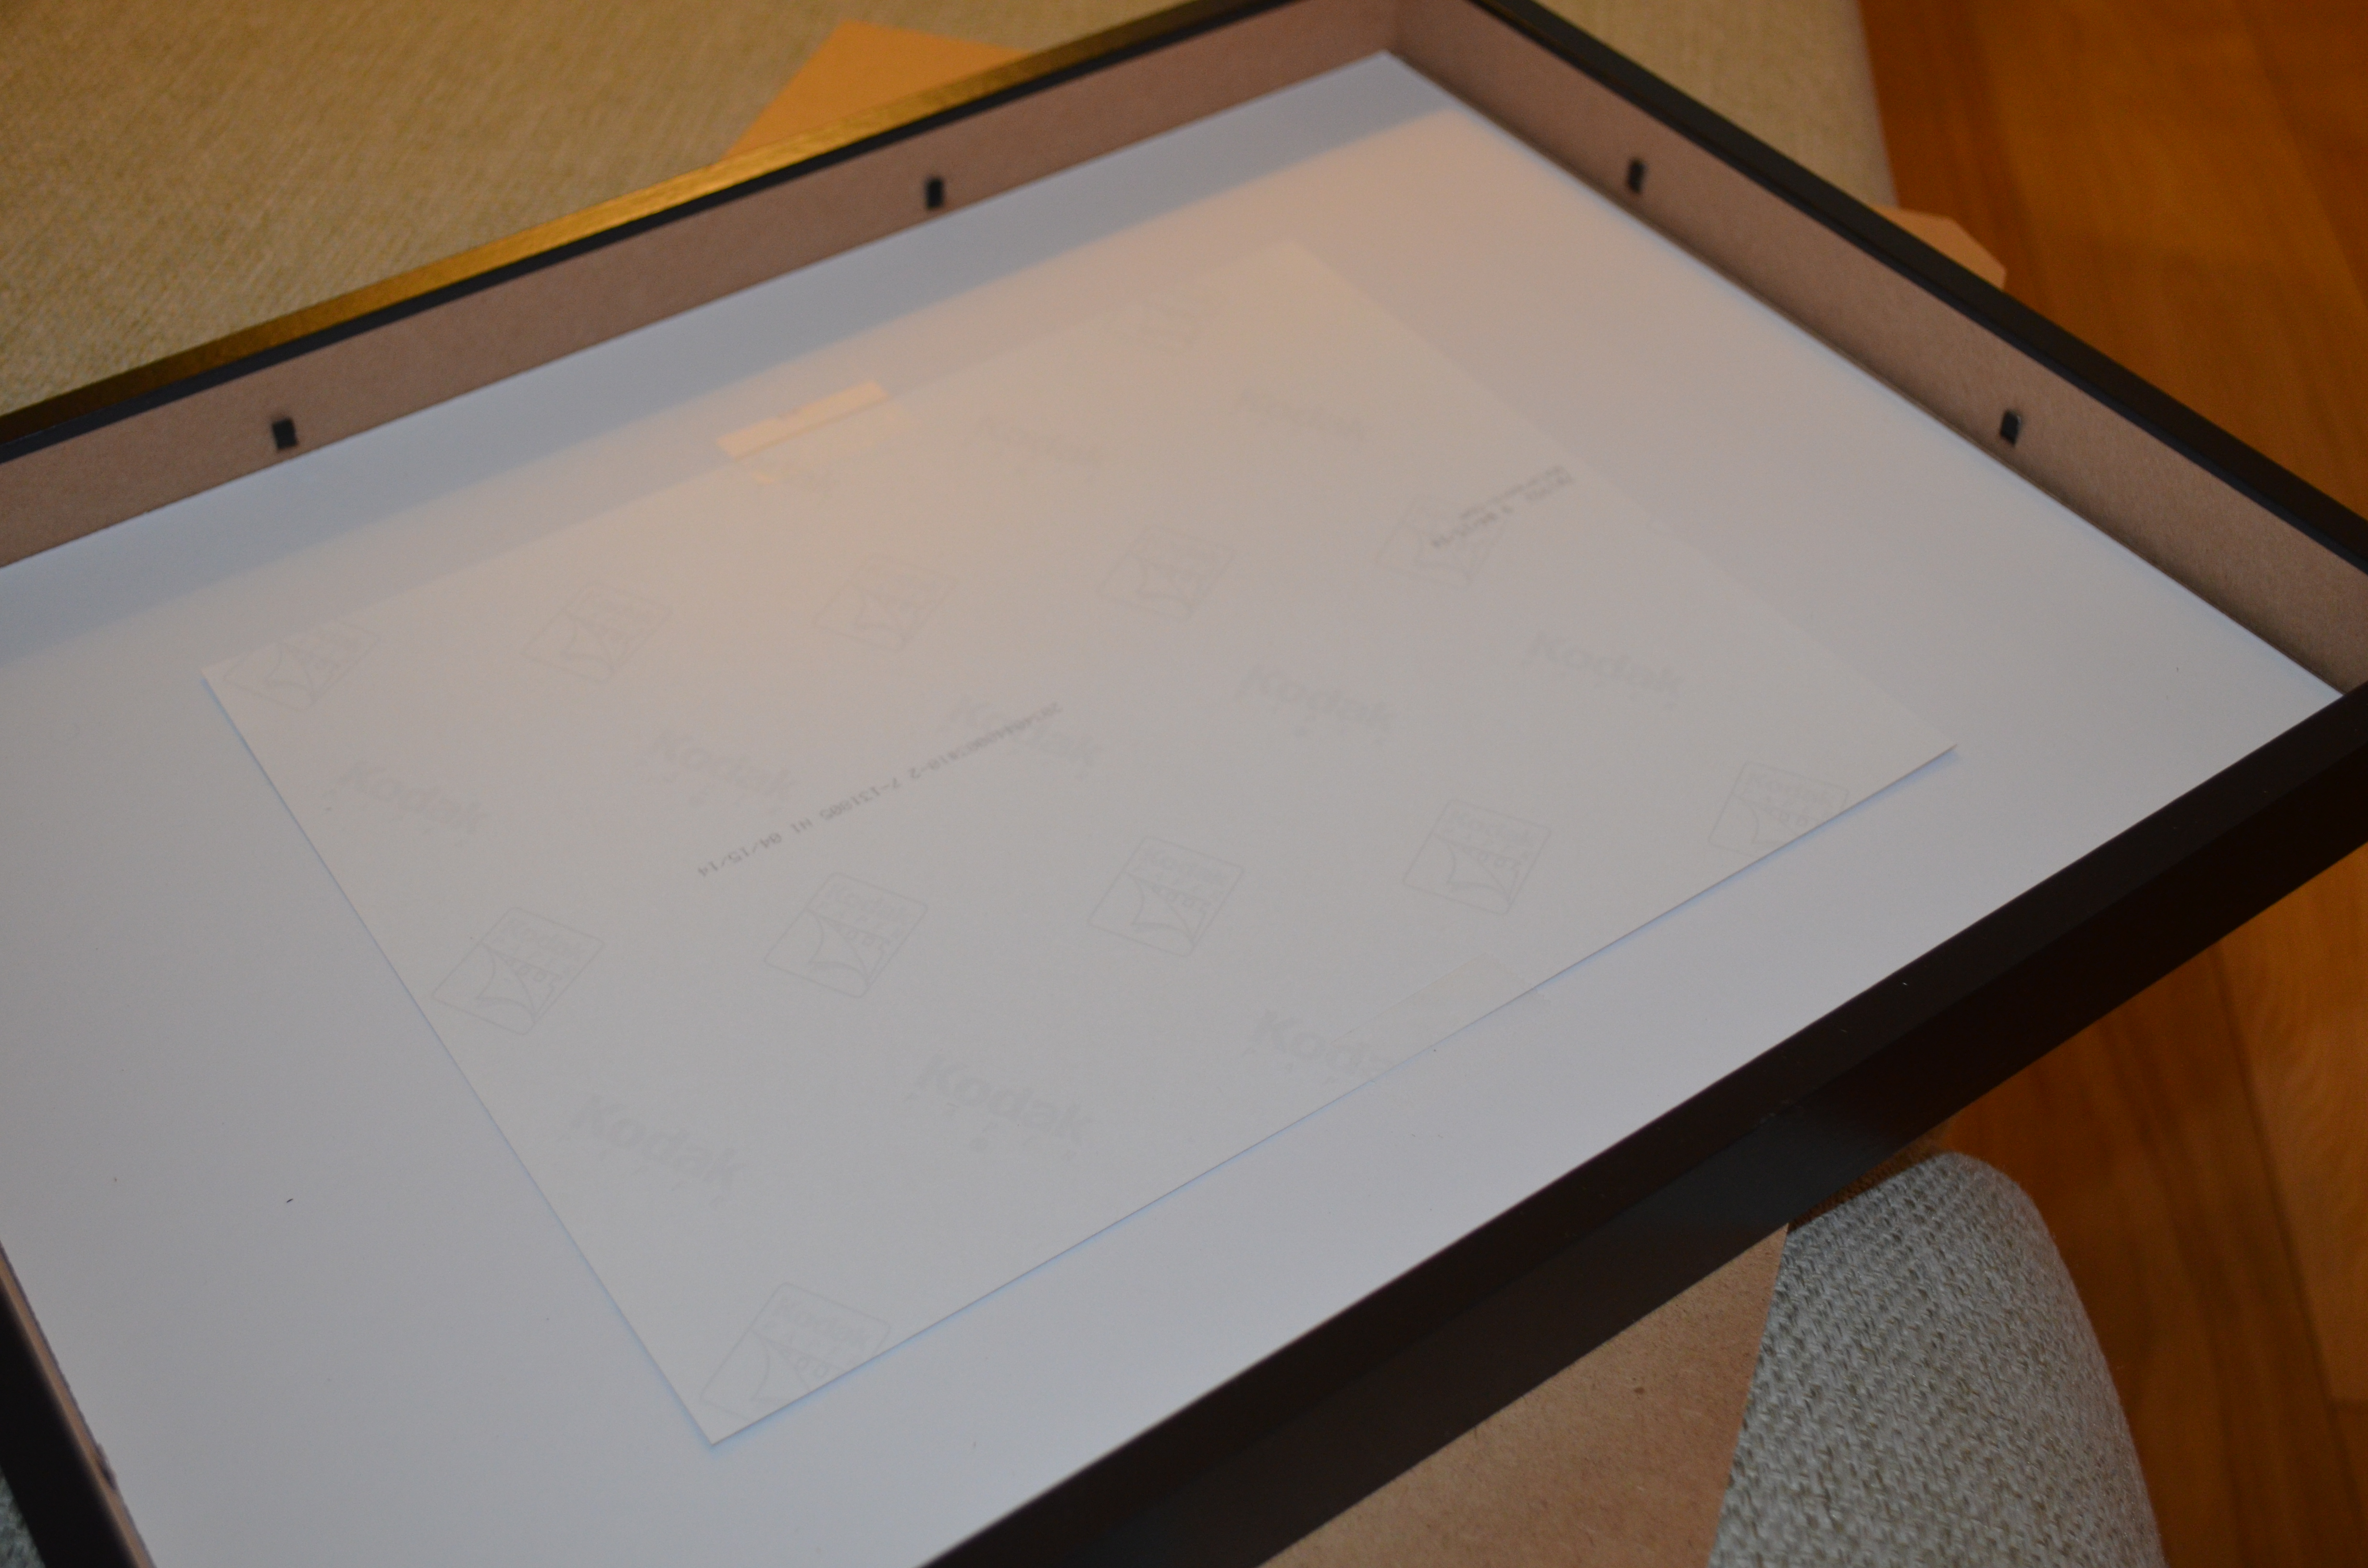
Place the picture in the frame with some present wrapping tape to avoid them from moving around the frame